Connect with us

Specific Types of Piercings

Surface Piercings: Understanding the Risks and Rewards

Keen to enhance your look with surface piercings? Discover the essential risks and rewards before making this bold decision.

Published

on

risks and rewards explained

Surface piercings can give you a unique aesthetic, but they come with notable risks. These piercings often face high rejection rates, estimated between 70-80%, which can lead to complications like irritation or infection. Healing takes time too, typically ranging from 1 to 5 years. Choosing the right jewelry, such as biocompatible materials and proper length, is essential for success. Proper aftercare, including regular cleaning and monitoring for issues, is crucial. Balancing the aesthetic rewards against these risks is key to your decision. There's more to reflect upon if you're ready to explore what that might entail.

Key Takeaways

  • Surface piercings have a high rejection rate of 70-80%, making them riskier than traditional piercings.
  • Healing times for surface piercings can vary widely, ranging from 1 to 5 years.
  • Proper jewelry selection, such as curved barbells or surface bars, is crucial for comfort and healing.
  • Regular aftercare, including saline cleaning and monitoring for irritation, is essential to prevent complications.
  • Surface piercings can provide unique aesthetic enhancements, but balancing risks with rewards is important for informed decisions.

Definition of Surface Piercings
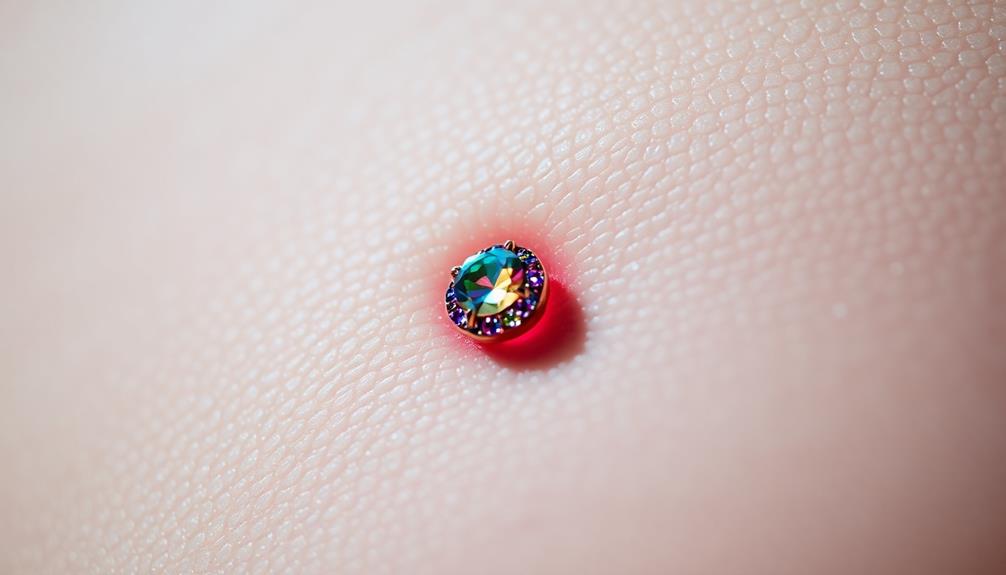
skin level body jewelry placement

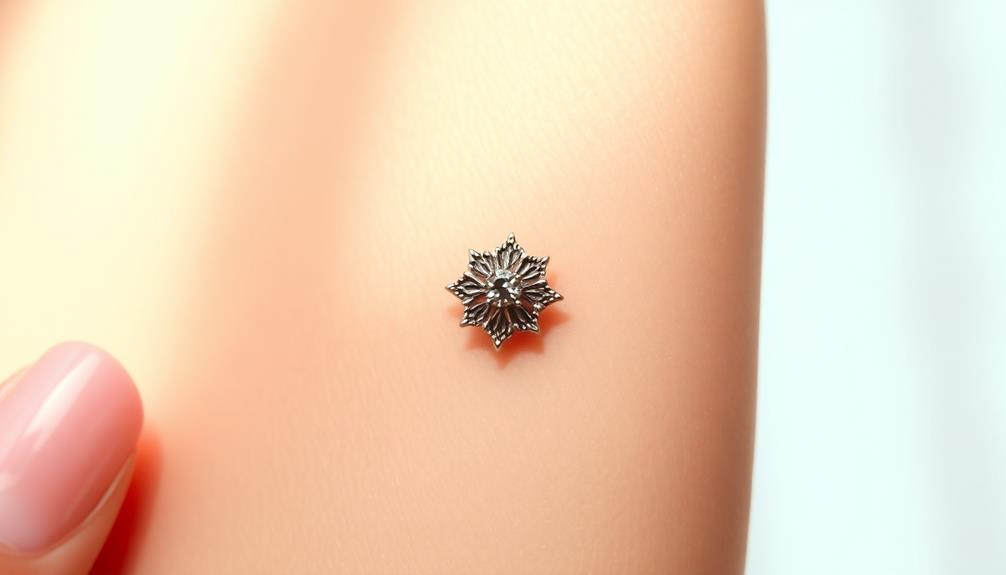
Surface piercings, often referred to as skin-divers, stand out due to their unique design that makes the jewelry look like it's floating just beneath the skin.

Unlike traditional body piercing methods, surface piercings enter and exit on the same side of the skin, which is why they require specialized curved barbell jewelry for proper placement. This design can create an eye-catching effect, but it also comes with its challenges.

One major concern is the healing time, which can range dramatically from 1 to 5 years. During this period, complications are common due to the shallow placement of the jewelry. Because of this, there's a significant chance of rejection over time, meaning the body might push the jewelry out.

If you're at risk, considering alternatives like dermal implants might be wise.

Additionally, it's crucial to recognize that if rejection occurs, surface piercings can leave noticeable scars. These scars often resemble lines where the jewelry once sat, serving as a reminder of the piercing.

Advertisement

Understanding these aspects helps you make informed decisions about surface piercings and their potential risks.

Types of Surface Piercings
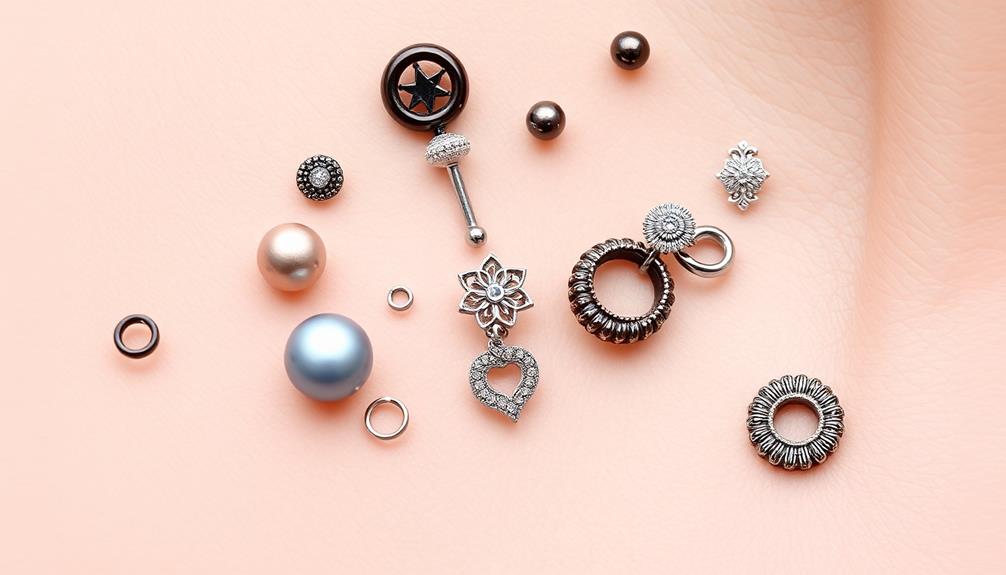
variety of surface piercings

When considering surface piercings, you'll find several common types to choose from, like anti-eyebrow and belly button piercings.

Each type typically uses either surface bars or surface anchors, which can affect how the jewelry looks and feels on your skin.

Understanding these options is essential for making a choice that suits your style and comfort.

Common Surface Piercing Types

Exploring the world of surface piercings reveals a variety of popular types that can enhance your style. These piercings create the illusion of floating jewelry beneath the skin, but it's important to know that they can be prone to migration and rejection over time. Here's a quick look at some common surface piercing types:

Piercing Type Location Unique Features
Anti-Eyebrow Just above the eyebrow Offers a striking facial aesthetic
Surface Tragus Piercing On the tragus of the ear Provides a unique ear embellishment
Belly Button Lower abdomen Popular for body art and style
Chest Center of the chest Creates a bold statement piece
Corset Piercing Along the spine Mimics a laced corset look

Among these, surface anchors stand out as they have a base under the skin, allowing for a different aesthetic. Remember, understanding your anatomy is vital for a successful surface piercing, especially in areas with defined features.

Advertisement

Jewelry Options Available

For those considering surface piercings, choosing the right jewelry is essential to both aesthetics and healing.

You'll typically encounter two main options: surface bars and dermal anchors. Surface bars are designed to rest flush against the skin, while dermal anchors feature an anchor that sits beneath the skin's surface, providing a different look and feel.

When selecting jewelry, keep these points in mind:

  • Jewelry Gauge Sizes: Surface piercings usually range from 16 to 18 gauge. This size is important for proper healing and comfort.
  • Material Matters: Opt for biocompatible materials like titanium, surgical steel, solid gold, or niobium to minimize irritation and promote healing.
  • Optimal Design: Curved barbells are often recommended since they reduce movement and the risk of rejection, ensuring your piercing remains secure and looks great.

Anatomy and Healing Considerations

healing through anatomical knowledge

Your anatomy plays an essential role in the success of surface piercings, as certain features can provide better support for the jewelry.

Healing times can vary widely, often taking 1-5 years, and complications like irritation may arise, especially in high-movement areas.

Understanding these factors is important to manage expectations and minimize risks effectively.

Advertisement

Anatomy's Role in Success

The success of surface piercings hinges on the anatomy of the area being pierced, as certain features can provide vital support for the jewelry. When contemplating a surface piercing, you must evaluate the area's anatomical characteristics.

Some spots, like navels and eyebrows, may not be ideal due to their tissue type and movement, which can lead to complications and increase the risk of rejection.

Here are some key factors to take into account:

  • Defined tissue structures: Areas with more stable anatomy, like helix piercings, offer better support than those with softer tissues.
  • Movement: High movement areas are more prone to rejection, affecting both the success of the piercing and the healing process.
  • Individual differences: Your unique anatomy can influence healing experiences, making communication with your piercer important for a successful outcome.

Ultimately, understanding the anatomy involved can enhance your chances of a successful surface piercing and a smoother healing journey.

Healing Duration Variability

Understanding how anatomy affects healing can shed light on the variability in healing durations for surface piercings. Healing time can range dramatically from 1 to 5 years, heavily influenced by your individual anatomy and the specific location of your piercing.

For instance, areas with defined ridges, like the helix, often provide more stability, promoting better healing. Conversely, flatter and more mobile areas, such as the navel or eyebrows, are more susceptible to irritation and longer healing times.

Advertisement

Your tissue characteristics are vital; ideal candidates for surface piercings should have suitable anatomy to minimize risks such as migration and rejection. Unfortunately, surface piercings have a rejection rate estimated between 70-80%, considerably higher than traditional piercings, largely due to movement and tissue type.

Individual variations in anatomy mean that each person's healing experience can differ vastly. This makes it essential for you and your piercer to engage in thorough discussions to set realistic expectations about your healing time and potential risks.

Understanding these factors will help you navigate your surface piercing journey more effectively.

Common Complications and Risks

When it comes to surface piercings, complications and risks can arise that are closely tied to your anatomy and the healing process. Unlike navel piercings, surface piercings have a much higher likelihood of migration and rejection, estimated at 70-80%. Factors such as your body's unique structure greatly influence the success of the piercing.

Areas with distinct ridges usually offer better security, while flat or uneven areas pose more challenges.

Advertisement

You should also be aware of the following complications:

  • Rejection or migration: Your body may push the jewelry out, especially if the piercing is too shallow.
  • Infection: Poor hygiene or improper aftercare can lead to infections that complicate healing.
  • Trauma: Movement or snagging the piercing can exacerbate the risk of complications.

Healing can take anywhere from 1 to 5 years, and rejection can occur at any time during this period.

To minimize complications, proper aftercare is essential. Misunderstanding the needs of surface piercings can lead to increased risks and delayed healing, so stay informed and attentive throughout the process.

Risks of Migration and Rejection

migration risks and rejection

Facing the possibility of migration and rejection is a critical concern for anyone considering surface piercings. These piercings have a migration and rejection rate estimated at 70-80%, considerably higher than traditional body piercings. This high rate stems from the body's natural response to foreign objects, as surface piercings are placed more shallowly, making them more susceptible to being pushed out over time.

Movement, snagging, and trauma to the area can further exacerbate the risk of migration and rejection. If you notice signs of rejection, such as irritation, visible jewelry, or enlarged holes, it's important to act quickly. Removing the jewelry can help prevent additional scarring that may resemble lines on your skin.

Good piercers often assess your anatomy and skin characteristics through pinch tests before piercing to gauge the likelihood of rejection.

Understanding these risks helps you make informed decisions about surface piercings. While they can enhance your look, be prepared for the possibility that your body may not accept them, leading to migration or rejection.

Advertisement

Jewelry Options for Surface Piercings

surface piercing jewelry choices

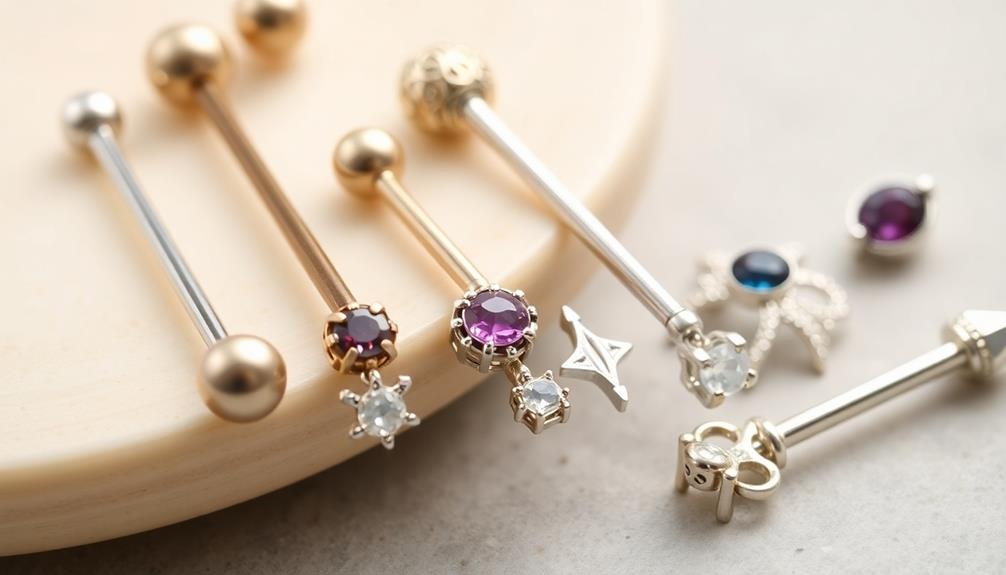
After considering the risks of migration and rejection, it's important to think about the jewelry options available for surface piercings. The right choice can greatly impact your healing process and overall experience. You typically have two primary options: surface bars and surface anchors.

  • Surface Bars: These are designed to sit flush against the skin, making them ideal for low-movement areas. They minimize snagging and irritation.
  • Surface Anchors: Featuring a base that resides beneath the skin, these anchors can provide a unique aesthetic while offering stability.
  • Material Choices: Opt for hypoallergenic materials like titanium, surgical steel, solid gold, or niobium to guarantee durability and reduce the risk of allergic reactions.

When selecting your jewelry, consider gauge sizes of 16 or 18, with lengths between 6-8mm for the best fit.

Aftercare for Surface Piercings
surface piercing care tips

Proper aftercare is essential for ensuring the health and longevity of your surface piercing. Start cleaning your piercing on the day of the procedure using sterile saline, as it's safer than homemade solutions. Clean the piercing twice daily with saline or a mild, fragrance-free soap solution to prevent infection and promote healing.

Here's a simple aftercare routine:

Step Action Frequency
Clean Use sterile saline on the piercing site Twice daily
Monitor Check for signs of irritation or rejection Daily
Avoid Touching the piercing unnecessarily Always
Apply Makeup around the piercing Never
Consult Your piercer for guidance if issues arise As needed

Avoid using antiseptics for daily cleaning; they should only be used if signs of infection appear, like redness or discharge. Limiting touching the area helps reduce the risk of contamination and irritation. By following these aftercare tips, you'll enhance your healing process and maintain a healthy surface piercing.

Surface Tragus Piercing Insights
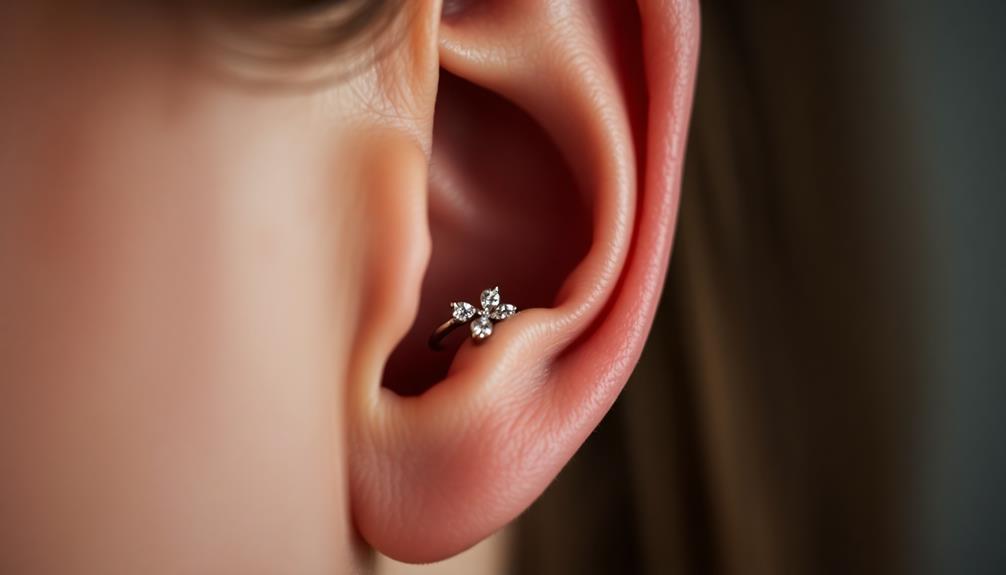
tragus piercing care tips

Surface tragus piercings offer a unique and stylish way to express your individuality, but they come with specific considerations. Unlike traditional cartilage piercings, a surface tragus piercing is performed on the surface of the tragus, which means it doesn't penetrate the cartilage. This can lead to a higher rejection rate, so it's essential to stay vigilant.

Here are a few key points to keep in mind:

  • Healing Time: Expect an average healing time of 3 to 6 months, but it can extend to a year. Proper aftercare is important for efficient healing.
  • Pain Levels: You might experience an initial discomfort rated around 3-4 on a scale of 1-10. Fortunately, this discomfort typically subsides as your piercing heals.
  • Professional Piercer: Always seek a professional piercer to guarantee the procedure is done correctly, reducing the risk of complications.

Regularly clean your surface tragus piercing with saline solutions and monitor for signs of infection or rejection.

Balancing Risks and Rewards
navigating risk reward dynamics

Maneuvering the landscape of surface piercings requires a careful balance of risks and rewards. While they offer a unique aesthetic appeal, the high rejection rates—estimated between 70-80%—demand your attention. Understanding these risks is essential before you commit.

Healing times can stretch from 1-5 years, during which ongoing care and monitoring are critical to minimize complications. Proper piercing care and hygiene are fundamental to guarantee a successful healing process, as neglecting these can lead to infections that compromise your piercing.

Choosing the right jewelry is another fundamental factor in your piercing's success. Opt for surface bars or microdermals to enhance longevity and reduce the likelihood of issues.

Advertisement

Remember, the quality of your aftercare directly impacts your healing process. Poor hygiene can lead to infections or irritation, increasing the chances of rejection.

You should also consider the potential for scarring or noticeable lines if rejection occurs. Weighing these risks against the aesthetic rewards is key.

Embrace the uniqueness of surface piercings, but be prepared for the commitment involved. By staying informed and proactive about your choices, you can navigate this intricate balance and make a decision that aligns with your style and comfort.

Frequently Asked Questions

What Are the Risks of Surface Piercings?

Surface piercings come with several risks, including high rejection rates, migration, and potential infection. If you don't follow proper aftercare, you might experience irritation, redness, or even discharge, leading to complications that require attention.

What Is the Risk of a Surface Tongue Piercing?

A surface tongue piercing carries risks like high rejection rates, infection, and migration. You should monitor it closely, practice proper aftercare, and be aware that complications can lead to discomfort and potential removal.

Advertisement

What Is the Psychology Behind Getting Piercings?

When you get piercings, you're often expressing your identity and reclaiming autonomy. This act can boost your self-esteem, trigger endorphins, and connect you to communities, serving as a powerful coping mechanism during life changes.

Why Not Get a Surface Tragus Piercing?

You might want to reconsider a surface tragus piercing due to its high rejection rate, potential irritation from facial movements, and limited jewelry options during healing. Proper aftercare is essential to avoid complications and disappointment.

Conclusion

In the world of surface piercings, the thrill of self-expression comes with its own set of challenges. You've learned about the risks of migration and rejection, but what if your piercing defies the odds and heals beautifully? Choosing the right jewelry and following proper aftercare could mean the difference between a stunning adornment and a painful reminder. Are you ready to embrace the journey, balancing those risks against the potential for an eye-catching masterpiece? The choice is yours.

Advertisement

Specific Types of Piercings

Genital Piercings: Types, Risks, and Sexual Impacts

Many seek genital piercings for enhanced pleasure, but are you aware of the risks and impacts they may have on your sexual experiences?

Published

on

genital piercings types risks

Genital piercings, like the Vertical Clitoral Hood and Prince Albert, can enhance sexual pleasure and sensitivity. They come with risks, including infections, nerve damage, and allergic reactions. Healing times vary, with most taking 4-8 weeks. Proper aftercare is essential; regular cleaning and avoiding irritation help prevent complications. You'll want to reflect on how a piercing can affect your sexual experiences, as many find it increases arousal for themselves and their partners. Remember, choosing a skilled piercer and using quality jewelry minimizes risks. Discovering the right piercing for you can lead to exciting experiences ahead.

Key Takeaways

  • Genital piercings include types such as VCH, HCH, Triangle, and Prince Albert, each offering unique benefits and sensations.
  • Risks involve infections, nerve damage, allergic reactions, and potential complications like urethra narrowing in males.
  • Healing times vary: VCH and PA typically heal in 4-6 weeks, while Triangle piercings can take 12-18 weeks.
  • Genital piercings can enhance sexual pleasure and arousal, increasing sensitivity and partner stimulation during intimate activities.
  • Proper aftercare is crucial, including regular cleaning and monitoring for infection signs to ensure safe healing.

Overview of Genital Piercings

genital piercings overview guide

When it comes to body modifications, genital piercings stand out for their unique placements and potential benefits. These piercings can vary in types, such as the Vertical Clitoral Hood (VCH), Horizontal Clitoral Hood (HCH), Triangle, and Prince Albert (PA), each offering distinct stimulation and enhancement of sexual pleasure.

Many individuals experience increased sensitivity and arousal from these modifications, particularly from VCH and Triangle piercings.

However, it's important to take into account the risks involved. Common risks include infections, nerve damage, and allergic reactions. For male piercings, complications like urethra narrowing can arise.

Healing times also differ, with VCH and HCH typically healing in 4-8 weeks, while Triangle piercings may take 12-18 weeks for full recovery.

Proper aftercare is vital for minimizing infection risk. This includes regularly cleaning the area with saline solutions and avoiding tight clothing during the healing period.

Advertisement

Types of Genital Piercings

genital piercing varieties explained

Genital piercings come in various types, each designed to enhance both aesthetic appeal and sexual pleasure. One of the most popular female genital piercings is the Vertical Clitoral Hood (VCH), which typically heals within 4-6 weeks and can greatly boost clitoral stimulation during sexual activity.

Another option is the Triangle piercing, located horizontally beneath the clitoral shaft, known for its ability to stimulate internal clitoral parts; however, it requires specific anatomical suitability.

For males, the Prince Albert (PA) piercing is a popular choice, designed to increase sensitivity and also healing within 4-6 weeks.

When considering these genital piercings, it's vital to choose skilled body piercers who utilize proper piercing techniques with sterile needles and suitable types of jewelry. The healing phase is important, as it can affect the overall experience and benefits of the piercing.

While many enjoy the enhanced sexual stimulation that these piercings can provide, it's important to remain aware of the risks associated with genital piercings.

Risks and Complications

potential issues and challenges

Undergoing a genital piercing carries inherent risks that you should be aware of before making a decision. Common risks include bacterial infections, bleeding, and nerve damage, which can lead to complications such as pain or sensitivity loss. You might also experience allergic reactions to jewelry materials, particularly nickel, so using high-quality materials like surgical stainless steel or titanium is imperative.

Additionally, there's the risk of bloodborne infections, including hepatitis B, C, and HIV/AIDS, if unsterilized equipment is used during the piercing process. For male genital piercings, specific complications may arise, such as urethra narrowing and even impotence, making careful assessment and professional evaluation essential.

Advertisement

To minimize these risks, proper aftercare and hygiene practices are critical. Neglecting these could result in severe inflammation or the need for surgical intervention.

It's also important to reflect on your pain tolerance, as the process varies for each person. By staying informed and taking necessary precautions, you can better navigate the risks and complications associated with genital piercings.

Sexual Benefits and Experiences

intimate relationships and pleasure

While understanding the risks and complications associated with genital piercings is important, many choose to undergo them for the potential sexual benefits they offer.

Genital piercings, like clitoral hood piercings, can greatly enhance sexual arousal and pleasure. Many individuals report the following benefits:

  1. Increased Sensitivity: Piercings can lead to heightened sensitivity, making every touch feel more intense.
  2. Enhanced Partner Stimulation: The presence of piercings can enhance partner stimulation, increasing overall arousal during intimate moments.
  3. Pleasure During Intercourse: Certain designs, like the triangle piercing, provide internal stimulation, enhancing pleasure during penetrative sex.
  4. Aesthetic Dimension: The visual appeal of genital piercings adds an exciting aesthetic dimension, potentially increasing partner attraction and excitement.

Ultimately, these factors contribute to enhanced sexual experiences, making intimacy more pleasurable.

However, it's important to remember that the risk of infection exists, and proper care must be taken to enjoy these benefits fully.

As you explore the world of body piercing, you may find that the rewards can far outweigh the risks when approached with caution and awareness.

Advertisement

Aftercare and Maintenance

post care and upkeep

Caring for your new piercing is essential to guarantee a smooth healing process and prevent complications. Start by cleaning the piercing site regularly with a saline solution, which helps promote healing and prevent infection.

Remember to wash your hands before touching the area to maintain hygiene and reduce the risk of introducing bacteria. During the healing process, avoid handling the piercing, as this can lead to irritation and increase the chance of infection.

It's important to refrain from sexual intercourse for at least two weeks post-piercing. This allows your body to heal properly and minimizes the risk of complications.

Keep an eye on the piercing during this time; monitoring for signs of infection, such as redness, swelling, discharge, or a foul smell, is critical. If you notice any concerning symptoms, don't hesitate to consult a healthcare professional.

Frequently Asked Questions

Are Genital Piercings Safe?

You should consider the safety of genital piercings carefully. While many people have successful experiences, risks like infections and complications exist. Proper hygiene and aftercare are essential to minimize these risks and promote healing.

What Is the Riskiest Piercing?

Imagine maneuvering a tightrope; the Prince Albert piercing often feels like that—balancing beauty with danger. It's considered the riskiest due to its sensitive placement, where complications like infection or urethral narrowing can occur.

Advertisement

What Are the Complications Associated With Intimate Body Piercings?

When considering intimate body piercings, you might face complications like infections, allergic reactions to materials, or specific issues like urethra narrowing. Proper aftercare and professional evaluation can help minimize these risks and guarantee safe healing.

Conclusion

In the vibrant tapestry of self-expression, genital piercings can add a bold stitch, weaving together beauty, intimacy, and risk. While they offer unique sensations and deepen connections, it's crucial to tread carefully, honoring both your body and your desires. By understanding the nuances and committing to proper aftercare, you can transform this journey into a celebration of pleasure and self-discovery. Embrace the adventure, and let your body tell its own enchanting story.

Continue Reading

Specific Types of Piercings

Conch Piercings: Inner vs. Outer Conch Considerations

The choice between inner and outer conch piercings can impact healing time, pain level, and jewelry options—discover which one suits your style best.

Published

on

inner versus outer conch

When considering conch piercings, you'll find two main options: inner and outer. The inner conch sits closer to the ear canal and takes longer to heal, usually around 6 to 12 months. It may be slightly more painful, rated about 6 out of 10. In contrast, the outer conch heals faster, typically in 3 to 6 months, and offers more diverse jewelry styles. Both require good aftercare to minimize risks. Think about your pain tolerance, healing time preference, and jewelry choices before deciding. Explore further to pinpoint what's best for your unique style.

Key Takeaways

  • Inner conch piercings take longer to heal (6 to 12 months) compared to outer conch piercings (3 to 6 months).
  • Pain levels for both inner and outer conch piercings are similar, generally rated around 6 to 7 out of 10.
  • Inner conch piercings typically use labret studs for a discreet look, while outer conch piercings allow for larger hoops and decorative styles.
  • Proper aftercare is crucial to minimize complications and ensure successful healing for both types of conch piercings.
  • The choice between inner and outer conch piercings depends on personal preference for visibility, healing time, and jewelry style.

Overview of Conch Piercings

conch piercing details overview

Conch piercings, named after their resemblance to a conch shell, are a popular choice for those looking to enhance their ear jewelry. Located in the middle cartilage of your ear, these piercings can be categorized into two types: inner conch and outer conch. The inner conch is situated closer to your ear canal, while the outer conch rests on the flat area of your outer ear.

When considering a conch piercing, it's important to note the healing time. Generally, it can take anywhere from 3 to 9 months for your piercing to heal, depending on your skin type and aftercare. The inner conch usually requires more time to heal compared to the outer conch, which tends to be less sensitive and often adorned with larger hoops.

Pain levels for conch piercings range from 6 to 7 out of 10, primarily due to the thickness of the cartilage.

Both inner and outer conch piercings offer fantastic opportunities for customization, allowing you to mix and match jewelry styles for a unique, stacked look.

Inner Conch Piercing Details

inner conch piercing guide

Exploring the inner conch piercing reveals its unique placement within the ear's cartilage, right next to the ear canal. This piercing typically features a labret stud, which provides a subtle look while accommodating potential swelling during the healing process.

Expect the healing time for your inner conch piercing to range from 3 to 9 months. Individual experiences may vary, so following proper aftercare is essential for a smooth healing journey. While the inner conch piercing can be more painful than lobe piercings, rated at about 6/10, the aesthetic appeal often outweighs the discomfort.

Advertisement

Here's a quick overview of the inner conch piercing:

Aspect Details Notes
Placement Central area of ear's cartilage Adjacent to the ear canal
Healing Time 3 to 9 months Varies by skin type and care
Jewelry Options Labret stud or decorative pieces Allows for personal expression

Choosing the right piercing jewelry can enhance the beauty of your inner conch while also ensuring comfort during healing.

Outer Conch Piercing Insights

outer conch piercing guide

When considering an outer conch piercing, you'll find a wide range of jewelry options, from larger hoops to decorative studs that really stand out.

The healing time is generally quicker than inner conch piercings, usually taking about 3 to 9 months.

Keep in mind that pain levels can vary, but many rate it around a 6 out of 10, similar to inner piercings.

Jewelry Options Available

Outer conch piercings offer a variety of jewelry options that can elevate your style. With the right pieces, you can express your individuality while ensuring comfort. The typical gauge size for these piercings is 16G (1.2mm), which strikes a balance between aesthetic appeal and wearability.

Advertisement

When it comes to jewelry types, you have several choices, including larger hoops that provide dynamic styling. Here's a quick overview of popular options:

Jewelry Type Description Material Options
Seamless Hoops Simple, clean design without visible seams Implant-grade titanium, surgical steel
Segment Hoops Features removable segments for easy wear Implant-grade titanium, surgical steel
Clicker Hoops Easy to open and close for convenience Implant-grade titanium, surgical steel
Gemstone Adorned Decorated with gems for added flair Hypoallergenic materials
Unique Designs Custom shapes and styles for personal touch Various hypoallergenic metals

Choosing the right jewelry can enhance your outer conch piercings while reflecting your personal style. Make sure to wait until your piercing is fully healed before switching to more elaborate options!

Healing Time Expectations

Understanding healing time expectations for your conch piercing is essential for a smooth recovery. For an outer conch piercing, the healing time typically ranges from 3 to 6 months.

However, individual factors like skin type and aftercare can influence this timeline. Compared to inner conch piercings, which may take up to a year to heal, outer conch piercings tend to recover faster due to their placement on the outer cartilage.

To guarantee you navigate the healing process effectively, consider these key points:

Advertisement
  1. Follow Aftercare Instructions: Regularly clean the area and avoid irritants to minimize healing time and reduce the risk of complications.
  2. Monitor Symptoms: Some swelling and tenderness are normal. Keep an eye on these symptoms to gauge your healing progress.
  3. Leave Jewelry in Place: Don't change the jewelry too soon. The initial jewelry should stay in place for at least 3 to 6 months to guarantee complete healing.

Pain Level Assessment

Getting an outer conch piercing can bring a mix of excitement and apprehension, especially regarding the pain level. Generally, people rate the pain from this piercing around 6 to 7 out of 10, largely due to the thicker cartilage in that area. Many describe the sensation as a sharp pinch, with the pain subsiding quickly after the initial puncture.

However, remember that pain experiences can vary greatly based on individual pain tolerances and anxiety levels. What feels intense to one person might be barely noticeable to another.

While outer conch piercings tend to be more painful than lobe piercings, they're usually less painful than other cartilage piercings, like the tragus.

To help ease discomfort during the healing process, follow proper aftercare. Avoid touching or twisting the jewelry, as this can lead to unnecessary irritation.

Pain Levels and Sensations

pain assessment and experience

Pain during conch piercings can be a significant factor for those contemplating this body modification. On the pain scale, conch piercings typically rate between 6 to 7 out of 10. The intensity can vary based on your individual pain tolerance and the specific area being pierced.

Here are three key points to reflect on:

  1. Inner Conch vs. Outer Conch: If you're opting for an inner conch piercing, expect sharper and more intense pain due to the thicker cartilage compared to the outer conch, which may feel slightly less painful.
  2. Initial Sensation: Many people report a sharp pinch during the piercing, followed by a dull ache. However, some experience minimal discomfort, highlighting the variability in pain perception.
  3. Post-Piercing Care: Healing discomfort can arise after the procedure, especially if the jewelry is moved or disturbed. Proper aftercare is essential to minimize pain and promote healing.

Understanding these factors can help you prepare for the experience and make informed decisions regarding your conch piercing journey.

Healing Time Comparison

duration of recovery analysis

When it comes to healing times for conch piercings, you'll notice a distinct difference between the inner and outer variations. The inner conch typically has a longer healing time, ranging from 6 to 12 months. This extended period is often due to its proximity to the ear canal and the thicker cartilage involved. On the other hand, outer conch piercings generally heal faster, averaging 3 to 9 months. This quicker recovery makes them a popular choice for those who prefer less downtime.

Healing times can vary considerably based on individual factors like skin type, body chemistry, and aftercare practices. It's important to maintain diligent aftercare for both types of piercings to prevent complications that could lead to even longer healing times. Additionally, monitoring for signs of infection is vital, as untreated infections can prolong the healing process.

Advertisement

Here's a quick comparison of the healing times:

Type of Conch Average Healing Time Notes
Inner Conch 6 to 12 months Thicker cartilage
Outer Conch 3 to 9 months Generally faster recovery
Individual Variation Varies Depends on personal factors
Aftercare Importance Critical Prevents complications

Aftercare Essentials

post treatment care necessities

After getting a conch piercing, it's vital to stick to proper cleaning techniques to keep the area hygienic.

You'll want to avoid any movement of the jewelry and monitor for signs of infection closely.

Following these aftercare essentials will help guarantee a smooth healing process.

Cleaning Techniques

To guarantee your conch piercing heals properly, cleaning it twice daily with a saline solution or saline spray is vital. This simple cleaning technique helps prevent infection and promotes ideal healing.

Avoid using soap, alcohol, or hydrogen peroxide directly on the piercing, as these can irritate the tissue and delay your healing process.

Advertisement

Here are some key cleaning steps to follow:

  1. Use Clean Hands or Sterile Tools: Always wash your hands thoroughly or use sterile tools to minimize the risk of introducing bacteria during the cleaning process.
  2. Gently Wipe Around the Jewelry: When cleaning, carefully wipe around the jewelry without twisting or moving it. This prevents trauma to the piercing, which is important during the healing period.
  3. Monitor for Signs of Infection: Keep an eye on your piercing for increased redness, swelling, or discharge. If you notice any concerning symptoms, consult a professional immediately.

Jewelry Movement Restrictions

Jewelry movement restrictions are essential for ensuring your conch piercing heals properly. Unnecessary movement of the jewelry can lead to irritation, prolonging the healing stage and increasing the risk of complications.

To support your healing, it's important to keep the jewelry still and avoid any pressure from hats, tight headphones, or accessories. These items can cause trauma to the piercing, making it harder for your body to heal.

During this period, keep your hair tied back and away from the piercing to prevent tangling or accidental pulling of the jewelry. Regularly monitor the site for signs of infection, such as redness or swelling.

Infection Monitoring Tips

Keeping a close eye on your conch piercing is essential for preventing infections during the healing process. Regular inspections can help you catch any potential issues early. Here are some infection monitoring tips to keep in mind:

  1. Inspect Daily: Check your piercing for increased redness, swelling, or discharge, especially during the first few months. These signs could indicate an infection that needs attention.
  2. Clean the Area: Make sure to clean the piercing site at least twice daily using a saline solution or antiseptic spray. This practice minimizes the risk of infection and aids in healing.
  3. Avoid Irritants: Refrain from touching or twisting the jewelry, as this can introduce bacteria. Also, limit exposure to pools, hot tubs, and other bodies of water until the piercing is fully healed.

If you notice persistent symptoms like fever or worsening pain, consult a professional piercer or healthcare provider immediately.

Early detection and proper care are key to ensuring your healing process goes smoothly and safely.

Advertisement

Jewelry Options for Conch Piercings

conch piercing jewelry choices

When it comes to selecting the right jewelry for your conch piercings, you'll find a range of options that cater to both inner and outer piercings. For inner conch piercings, labret studs are the most common choice, while outer conch piercings often feature larger hoops or seamless rings for a bolder look.

Jewelry options typically range in gauge sizes from 14G to 16G, with your piercer determining the best size based on your individual anatomy. It's vital to choose the right gauge to guarantee a comfortable fit and promote healing.

When considering material options, go for implant-grade titanium, surgical steel, or hypoallergenic gold. These materials minimize the risk of allergic reactions during the healing process, which is significant for your comfort and safety.

After the initial healing period, usually around six months, you can explore various styles and designs, including decorative gemstones and unique shapes that reflect your personal style.

Just remember to consult with a professional piercer before making any jewelry changes to guarantee safe and proper modifications.

Cost Considerations

budgeting for expenses

Considering a conch piercing involves not just the procedure itself but also the costs associated with it. The average cost of a conch piercing ranges from $30 to $90, influenced by the piercer's expertise and location. When you factor in the price of quality jewelry, you might find the total expenses rising.

Here are some key cost considerations to keep in mind:

Advertisement
  1. Initial Piercing Costs: Expect to pay between $30 and $90 for the piercing itself, depending on your chosen artist and their experience.
  2. Jewelry Expenses: Quality jewelry can add another $50 to $100. Opting for implant-grade titanium or surgical steel is essential to avoid allergic reactions and guarantee a smooth healing process.
  3. Aftercare Products: Don't forget to budget for aftercare supplies, as maintaining hygiene is important during the healing process. These products can add to your overall costs.

Prioritizing the piercer's experience and the quality of jewelry over the lowest price can save you from complications and guarantee a successful healing experience.

Investing wisely here will pay off in the long run.

Potential Risks and Complications

health risks and complications

Steering through the world of conch piercings comes with certain potential risks and complications that every individual should be aware of. Neglecting proper aftercare can lead to infections and inflammation during the healing process, which can take anywhere from 3 to 9 months. Avoid using earbuds until your piercing is fully healed, as they increase the risk of irritation and infection.

It's also essential to recognize signs of complications early on. If you notice excessive redness, swelling, or discharge, consult a professional piercer or healthcare provider immediately.

Here's a quick overview of potential complications:

Complication Description
Infection Caused by improper aftercare or irritants.
Keloid Formation Excessive scar tissue growth, especially for sensitive skin.
Prolonged Healing Increased discomfort and pain, rated 6-7 out of 10.
Signs of Complications Redness, swelling, or discharge indicate issues.

Choosing the Right Piercing

selecting ideal body piercing

After understanding the potential risks and complications associated with conch piercings, it's time to focus on how to select the right one for you.

The choice between an inner conch and an outer conch piercing hinges on several key factors:

  1. Location: The inner conch is closer to the ear canal and typically requires a labret or cartilage stud, while the outer conch is on the flatter part of your ear, allowing for diverse jewelry options like hoops.
  2. Healing Time: If you prefer a quicker healing process, the outer conch may be your best bet, as it usually heals faster than the inner conch, which can take 6 to 9 months.
  3. Aesthetic Preference: Consider how visible you want your piercing to be. The inner conch offers a more subtle look, while the outer conch makes a bolder statement, showcasing your unique style.

Ultimately, choosing the right piercing involves balancing pain tolerance, healing time, and your personal style.

Think carefully about these factors to guarantee you make a decision that aligns with your preferences and lifestyle.

Advertisement

Frequently Asked Questions

What Is the Difference Between Inner and Outer Conch Piercings?

When you compare inner and outer conch piercings, you'll notice they differ in placement, healing times, jewelry styles, and aftercare needs. The inner conch is deeper, while the outer offers more design flexibility.

How Bad Does an Outer Conch Piercing Hurt?

About 30% of people rate outer conch piercings as a 7 on the pain scale. You'll feel a sharp pinch followed by pressure, and discomfort may linger for days, but proper care can help.

Can You Put a Hoop in an Inner Conch Piercing?

Yes, you can put a hoop in an inner conch piercing, but it's best to wait until it's fully healed. Initially, stick with a stud to minimize movement and irritation during the healing process.

How Do You Know if You Have the Anatomy for a Conch Piercing?

You might wonder if conch piercings fit your anatomy. Check your ear's cartilage size and shape. A professional piercer can assess its suitability during a consultation, ensuring enough space for your desired jewelry.

Conclusion

In the grand symphony of body art, conch piercings play a fascinating melody, whether you choose the inner or outer route. As you navigate your decision, remember that each option offers its own unique harmony of style and sensation. Embrace the journey, weigh the risks, and let your personal taste guide you. Ultimately, this choice is your chance to add a striking note to your aesthetic composition, creating a beautiful narrative that's distinctly yours.

Advertisement
Continue Reading

Specific Types of Piercings

Navel Piercings: Best Practices for Active Lifestyles

Follow these essential tips for caring for your navel piercing during an active lifestyle, and discover how to keep irritation at bay while exercising!

Published

on

active lifestyle navel piercing tips

If you've got a navel piercing and live an active lifestyle, you'll want to prioritize proper care. Wait at least two weeks before engaging in high-impact workouts to avoid irritation. During healing, stick to low-impact exercises and be mindful of your clothing; breathable garments help reduce sweat and friction. Clean your piercing with saline solution 2-3 times daily to prevent infection. Also, choose high-quality jewelry made from surgical steel or titanium to minimize discomfort. Staying vigilant about signs of complications can guarantee a successful healing process. There's a lot more to explore about care routines and specific exercise tips.

Key Takeaways

  • Wait at least two weeks before engaging in high-impact exercises to prevent strain on the navel piercing.
  • Clean the piercing with saline solution 2-3 times daily, especially after workouts, to prevent infection.
  • Choose jewelry made from surgical steel or titanium to minimize irritation and enhance comfort during physical activities.
  • Wear loose, breathable clothing to avoid friction and limit sweat exposure on the piercing area while exercising.
  • Monitor for signs of infection, such as persistent redness or swelling, and seek timely intervention if complications arise.

Understanding Navel Piercings

navel piercing insights explained

When you consider getting a navel piercing, it's important to understand what the process involves and how it can fit into your active lifestyle. Navel piercings typically involve creating a hole in the belly button area, with the most common placement on the upper rim.

Each piercing type, whether it's inverse, side, or double, requires specific aftercare to guarantee proper healing.

The healing process for a navel piercing usually takes between 6 to 12 months. During this time, you might notice initial signs like redness, swelling, and tenderness.

To minimize infection risks and promote healing, it's vital to choose high-quality piercing jewelry, often made from implant-grade titanium.

As you embrace your active lifestyle, remember to clean your piercing diligently. Use saline solutions and avoid tight clothing that can irritate the area.

Advertisement

This aftercare is essential to prevent complications and guarantee your navel piercing heals successfully. Understanding these aspects will help you enjoy your new piercing while maintaining an active, healthy routine.

Piercing Process Overview

body piercing procedure guide

Getting a navel piercing involves a careful and precise process that guarantees both safety and comfort. First, a professional piercer assesses your anatomy to determine the best placement for the piercing. They'll then thoroughly clean the area to reduce the risk of infection.

After marking the desired location, the piercer uses a sterilized 14g hollow needle to create the piercing, which minimizes complications compared to using a piercing gun.

Once the piercing is complete, it's important to choose high-quality jewelry, preferably made from implant-grade titanium. This type of jewelry is less likely to cause irritation during the initial healing phase.

You'll likely experience some post-piercing soreness and tenderness, which is completely normal.

Proper aftercare is vital for ensuring successful healing. Follow your piercer's aftercare instructions, which typically include keeping the area clean, avoiding swimming in pools or hot tubs, and not changing the jewelry until the piercing has fully healed.

Advertisement

Healing Timeline and Challenges

recovery journey and obstacles

Healing from a navel piercing is a journey that typically spans 6 to 12 months, with the first few weeks being particularly vital.

During this time, you might experience swelling and tenderness, which can be exacerbated by your workout regimen. To guarantee your piercing heals properly, avoid high-impact exercises or any activities that put pressure on the area for at least two weeks post-piercing.

Keeping your piercing clean is essential. Use a saline solution to cleanse the area regularly, as this helps prevent infection and minimizes long-term issues.

Monitor your piercing closely during the healing phase for any signs of complications—excessive redness, unusual swelling, or discharge can indicate problems that need attention.

Importance of Aftercare

significance of post treatment support

Aftercare is essential for your navel piercing, and it starts with regular cleaning techniques.

You'll want to clean the area 2-3 times a day with saline solution to fend off infection.

Keeping an eye out for any signs of infection will help guarantee your piercing heals properly.

Advertisement

Regular Cleaning Techniques

For the first few months after getting your navel pierced, regular cleaning is essential to guarantee a smooth healing process. You should clean your new piercing with a saline solution 2-3 times daily. This helps prevent infection and promotes healing during the significant 6-12 weeks post-piercing.

Avoid using alcohol or peroxide, as these can dry out the area and hinder healing.

Incorporating saline soaks into your routine can be particularly beneficial. These soaks help keep the piercing moist and reduce irritation, which is important for an active lifestyle.

After your workout routine, make sure to clean the area thoroughly, as sweat can harbor bacteria that may lead to infection if left unaddressed.

While you perform your regular cleaning, keep an eye out for any signs of infection, such as unusual redness, swelling, or discharge. Monitoring these symptoms is essential for ensuring timely intervention if complications arise.

Advertisement

Infection Prevention Strategies

Proper aftercare is essential for keeping your navel piercing infection-free and ensuring it heals correctly. By following specific hygiene practices, you can promote healing and prevent complications.

Strategy Description Frequency
Saline Solution Cleaning Clean your navel piercing with saline solution. 2-3 times daily
Monitor for Infection Look for unusual redness, swelling, or discharge. Daily checks
Avoid Touching Don't touch your piercing with unwashed hands. Always

It's vital to keep the area dry. Stay away from pools, baths, or hot tubs until your piercing is fully healed. This helps prevent bacteria from entering the piercing site. Also, make sure to maintain a healthy diet and stay hydrated; this supports your body's healing and lowers the risk of infection. Remember, your navel piercing requires attention and care. By adhering to these practices, you can enjoy your active lifestyle without compromising your piercing's health!

Exercise Considerations for Healing

healing through targeted exercise

Navel piercings require careful attention during the healing process, especially when it comes to exercise. You need to be mindful of how your workouts might affect your healing piercing.

It's best to wait at least two weeks before engaging in vigorous exercise. High-impact activities, like weightlifting, can exert pressure on the navel area, which you should avoid during the initial healing phase.

Instead, consider these suggestions:

  • Opt for low-impact exercises, like walking or gentle stretching.
  • Modify your leg routines to prevent strain on the piercing.
  • Always listen to your body; if you feel discomfort or pain, take a break.
  • Clean your piercing regularly with a saline solution after workouts to prevent bacteria buildup.

Jewelry Choices for Active Lifestyles

active lifestyle jewelry options

When you're active, choosing the right jewelry for your navel piercing is essential for both comfort and safety.

Opt for materials like surgical steel or titanium to prevent irritation, and pick designs like flat back studs that won't snag easily during workouts.

Advertisement

Always consider how your jewelry fits and consult with a professional piercer to guarantee it meets your lifestyle needs.

Safe Jewelry Materials

Choosing the right jewelry material for your navel piercing is crucial, especially if you lead an active lifestyle. The materials you select can greatly affect your healing process and overall comfort.

Understanding the importance of common financial terms can help you make informed decisions about your budget for jewelry. Here are some safe jewelry materials to take into account:

  • Surgical Steel: This is the preferred choice, minimizing allergic reactions and offering durability for your active pursuits.
  • Implant-Grade Titanium: Lightweight and resistant to corrosion, it's perfect for those who engage in vigorous physical activities.
  • Avoid Organic Materials: These can break easily and may harbor bacteria, increasing the risk of infection.
  • Design Considerations: Opt for small, flat back studs or hoops that sit flush against the skin to reduce snagging during workouts.

Make sure the length of the jewelry barbell accommodates swelling during your initial healing phase. This helps prevent irritation and guarantees a smooth recovery.

Design for Comfort

Comfort is key for anyone with a navel piercing who leads an active lifestyle. You'll want jewelry that fits snugly and comfortably against your skin, minimizing the risk of snagging during workouts. Consider opting for flat back studs or small hoops, as they sit flush against the skin.

Choosing the right material is also important. Implant-grade titanium and surgical steel are excellent choices that reduce the risk of allergic reactions and irritation while you move. A good idea is to consult with a professional piercer to guarantee you select jewelry that accommodates swelling and movement.

Advertisement

Make certain to choose the right length for your jewelry; if it's too short, it can create pressure, while jewelry that's too long may snag or cause discomfort. Avoid organic materials since they can break easily and may harbor bacteria, increasing infection risks.

Here's a quick reference table for your jewelry options:

Jewelry Type Benefits
Flat Back Studs Sits flush, minimizes snagging
Small Hoops Comfortable and low-profile
Titanium/Surgical Steel Hypoallergenic, durable
Professional Piercer's Advice Guarantees comfort and safety

Protecting Your Piercing During Workouts

safeguarding piercings while exercising

Protecting your navel piercing during workouts is vital for ensuring its proper healing and preventing irritation. To keep your belly piercing safe while staying active, follow these best practices:

  • Wear breathable cotton garments that cover your jewelry, ensuring they aren't too tight.
  • Avoid high-impact exercises, like sit-ups and weightlifting, for at least two weeks post-piercing.
  • Keep your piercing away from gym machines and surfaces to minimize contact with bacteria.
  • Cover your piercing with a loose-fitting shirt to prevent snagging and limit sweat exposure.

After each workout, it's important to clean your piercing with a saline solution. This helps remove sweat and bacteria, promoting healthy healing.

Remember, new piercings are particularly sensitive; being careful during workouts will greatly reduce the risk of irritation or complications. Staying away from tight clothing and high-contact activities will also help you maintain your piercing's integrity.

Signs of Complications to Watch For

monitor complications carefully today

When you notice redness and swelling around your navel piercing, it's time to pay attention.

Persistent pain or discomfort, especially if it lasts more than a few weeks, could signal a problem.

Any unusual discharge or fluid should be addressed immediately to prevent further complications.

Advertisement

Redness and Swelling Indicators

While navel piercings can complement an active lifestyle, it's important to keep an eye out for signs of complications like redness and swelling. You should closely monitor these symptoms to guarantee proper healing and catch any potential infections early.

Here are some key indicators to watch for:

  • Persistent redness around the piercing that lasts more than a few days may signal inflammation or infection.
  • Increasing swelling during the initial healing phase is a cause for concern and should be closely observed.
  • Look for red or violet lines appearing above the piercing site, as these can indicate irritation or infection needing immediate attention.
  • If you notice bumps or pain developing four months after the piercing, it could mean an infection that requires prompt evaluation from a professional.

Continuous monitoring for unusual redness, discharge, or persistent swelling can help you catch complications early, improving your healing outcomes.

Staying vigilant will allow you to enjoy your navel piercing without compromising your active lifestyle. If in doubt, don't hesitate to consult a professional piercer for guidance.

Persistent Pain and Discomfort

After getting a navel piercing, you might experience some discomfort, but persistent pain that lingers beyond the initial healing period is a sign something could be wrong.

If you find that discomfort continues four months post-piercing, it could indicate an infection, and you should consult a professional piercer immediately.

Advertisement

Watch for red or violet lines appearing above the piercing; these can signal complications that need closer monitoring.

A noticeable bump around the piercing site, especially if it's painful, may suggest irritation or infection, requiring prompt attention.

If you notice skin tissue protruding from the piercing hole, it could mean excessive pressure on the jewelry, so adjustments might be necessary to prevent further issues.

Most navel piercings heal within 6 to 12 months, but consistent soreness beyond this timeframe warrants evaluation.

It's important to rule out serious problems like keloid formation or ongoing infection.

Advertisement

Taking these signs seriously will help guarantee your piercing remains a source of beauty rather than a source of discomfort.

Always prioritize your health and comfort in your active lifestyle.

Unusual Discharge or Fluid

Persistent pain and discomfort are indicators that something may be wrong with your navel piercing, but unusual discharge or fluid can be equally concerning. If you notice any discharge that's yellow, green, or foul-smelling, it could signal an infection and requires immediate evaluation by a professional.

While some clear or whitish fluid is normal during the healing process, keep an eye out for changes that may indicate complications.

Watch for these signs:

Advertisement
  • Persistent or increasing fluid, especially if it has an unusual color or odor
  • Red or violet lines above the piercing site, which may indicate irritation or infection
  • Bumps or pain after four months of healing, suggesting potential rejection or infection
  • Signs of excessive pressure around the piercing, along with fever or increased pain

If you experience any of these symptoms, it's essential to consult with a piercer or healthcare provider.

Early intervention can prevent further complications and help guarantee that your navel piercing remains a safe and enjoyable part of your active lifestyle.

Don't ignore these warning signs; your health should always be your priority.

Adjusting Your Workout Regimen

optimize your exercise routine

To guarantee a smooth shift back into your workout routine after getting a navel piercing, it's crucial to adjust your regimen during the healing process. Keep in mind that your body needs time to heal. Wait at least two weeks before engaging in vigorous workouts to reduce the risk of irritation.

During this initial phase, focus on low-impact activities like walking, stretching, or yoga. These exercises promote healing without putting pressure on your new piercing. The good news is that you can still stay active while being cautious.

Avoid high-impact exercises and movements that strain your abdominal area, like sit-ups or heavy weightlifting, until your piercing is fully healed, which can take 6 to 12 months.

As you adjust your workout, modify leg routines to prevent strain on the belly button piercing. Approach exercises like squats and lunges with caution initially.

Advertisement

Gradually increase the intensity of your workouts as healing progresses, always listening to your body. If you experience any discomfort, make the necessary adjustments.

With patience and care, you can maintain your active lifestyle while allowing your belly button piercing to heal properly.

Long-term Maintenance and Care

ongoing support and management

Maintaining the health of your navel piercing requires commitment even after the initial healing period. To keep your piercing looking great and free from complications, regular cleaning and monitoring are essential.

Here are some best practices to follow:

  • Use saline spray daily to cleanse the area and prevent infections.
  • Monitor for signs of irritation, like redness or swelling, to catch potential issues early.
  • Wear breathable clothing that reduces friction on the piercing site, promoting comfort during workouts.
  • Replace jewelry that's high-quality and hypoallergenic after the healing phase to minimize irritation.

Frequently Asked Questions

How to Exercise With a Navel Piercing?

To exercise with a navel piercing, wait two weeks before vigorous activity. Choose low-impact workouts, wear loose clothing, and clean your piercing after each session. Gradually increase intensity while listening to your body's signals.

How to Protect a Belly Piercing When Playing Sport?

Did you know that around 20% of belly piercings get infected post-exercise? To protect yours, wear loose clothing, avoid high-impact moves, and clean it regularly, ensuring you minimize irritation while staying active.

How Long After a Navel Piercing Can I Exercise?

You should wait at least two weeks after your navel piercing before exercising. This allows for initial healing. Listen to your body, and consult a professional for personalized advice based on your healing progress.

Advertisement

Do and Don'ts of a Belly Button Piercing?

When caring for your belly button piercing, clean it regularly, avoid tight clothing, and don't change the jewelry too soon. Stay away from high-impact exercises until it's fully healed to prevent complications.

Conclusion

In the vibrant dance of your active life, navel piercings can shine like a beacon of self-expression. By embracing aftercare and adjusting your workouts, you'll keep that sparkle intact while you conquer each challenge. Imagine the thrill of a high-energy class or a invigorating run, your piercing gleaming as a declaration of your commitment. Stay vigilant for any signs of trouble, and nurture your piercing like a cherished secret, ensuring it remains a stunning part of your journey.

Continue Reading
Advertisement

Affiliate Disclaimer
As an affiliate, we may earn a commission from qualifying purchases. We get commissions for purchases made through links on this website from Amazon and other third parties.

Latest

piercings meet tech innovation piercings meet tech innovation
Unique and Trending Topics5 days ago

The Intersection of Piercings and Wearable Technology

Uncover how modern piercings blend style and health monitoring, transforming body art into essential tech accessories that could redefine personal...

nature inspired piercing designs nature inspired piercing designs
Unique and Trending Topics6 days ago

Piercings Inspired by Nature: Floral, Animal, and Cosmic Designs

Wildly unique piercings inspired by nature's beauty invite personal expression—discover the enchanting symbolism behind floral, animal, and cosmic designs.

eco friendly piercing jewelry practices eco friendly piercing jewelry practices
Unique and Trending Topics7 days ago

Sustainable and Eco-Friendly Piercing Practices and Jewelry

Piercing practices can be eco-friendly and sustainable, but do you know how your choices can transform the jewelry industry for...

faux piercings for commitment averse faux piercings for commitment averse
Unique and Trending Topics1 week ago

The Rise of Faux Piercings: Options for Commitment-Phobes

Keen to explore the stylish world of faux piercings? Discover how these trendy accessories can elevate your look without the...

safe adult piercing gatherings safe adult piercing gatherings
Unique and Trending Topics1 week ago

Piercing Parties for Adults: How to Host a Safe and Fun Event

Discover the secrets to hosting a safe and unforgettable piercing party for adults that will leave your guests buzzing with...

augmented reality piercing preview augmented reality piercing preview
Unique and Trending Topics1 week ago

Virtual Piercing Try-Ons: Using AR Technology to Preview Your Look

Transform your piercing experience with AR technology that lets you preview your look; find out how this innovation is changing...

radiant safety jewelry choices radiant safety jewelry choices
Unique and Trending Topics2 weeks ago

Glow-In-The-Dark Piercing Jewelry: Safety and Style Considerations

Learn essential safety tips and stylish choices for glow-in-the-dark piercing jewelry that ensure your look shines while prioritizing your well-being....

workplace piercings rights policies workplace piercings rights policies
Professional and Lifestyle2 weeks ago

Piercings in the Workplace: Know Your Rights and Company Policies

Find out how to navigate workplace piercing policies and discover your rights—there's more to learn about advocating for inclusivity.

navigating piercing conversations respectfully navigating piercing conversations respectfully
Professional and Lifestyle2 weeks ago

How to Discuss Your Desire for Piercings With Conservative Family Members

Find thoughtful ways to discuss your piercing aspirations with conservative family members and discover strategies that can lead to understanding...

safe piercings for athletes safe piercings for athletes
Professional and Lifestyle2 weeks ago

Piercings and Exercise: Best Practices for Athletes and Fitness Enthusiasts

Piercings and exercise can coexist harmoniously, but knowing the best practices is crucial for your safety and comfort—discover essential tips...

piercings reflect personality traits piercings reflect personality traits
Professional and Lifestyle2 weeks ago

The Psychology of Piercings: What Your Choices Say About Your Personality

Navigating the world of body piercings reveals fascinating insights into your personality; what secrets might your choices uncover about your...

piercings trend in beauty piercings trend in beauty
Professional and Lifestyle2 weeks ago

Piercings in the Beauty Industry: Trends Among Makeup Artists and Hairstylists

Uncover how piercings are redefining beauty standards among makeup artists and hairstylists, sparking a movement that challenges traditional norms. What...

Trending

Copyright © 2024 Piercings-Body Affiliate disclaimer As an affiliate, we may earn a commission from qualifying purchases. We get commissions for purchases made through links on this website from Amazon and other third parties.