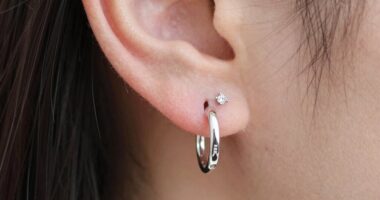

TL;DR

Get beauty and skincare favorites delivered free with Prime
- Fast, free delivery on millions of items
- Prime Video, Amazon Music and more included
- Member-only deals all year
Body piercing starter kits vary widely; professional piercing is safer. If choosing DIY, prioritize sterile, single-use needles, high-quality jewelry, and proper hygiene. Never reuse needles or ignore sterilization.
Getting a new piercing can feel exciting—like adding a splash of color or shine to your look. But behind that shiny surface lies a world of safety considerations most DIY kits overlook. While the lure of piercing at home is tempting, it’s essential to understand what’s real, what’s risky, and what makes a kit truly safe. This guide will walk you through everything you need to know before picking up that starter kit, helping you make smarter decisions for your health and style.
Whether you’re considering your first earlobe or a more complex cartilage piercing, knowing the ins and outs of proper equipment, technique, and aftercare saves you from trouble down the line. Because when it comes to your body, safety isn’t a place to cut corners. Let’s explore what makes a body piercing starter kit good, bad, or downright dangerous—and how you can tell the difference.
Always verify that needles are single-use, sterile, and from a reputable source.
Piercing guns are generally unsafe for most body locations and should be avoided.
Choose jewelry made of implant-grade titanium, gold, or high-quality steel, and ensure proper sizing.
Proper technique, anatomical knowledge, and sterile procedures are non-negotiable for safety.
Professional piercing studios follow strict hygiene and legal standards—DIY kits cannot replace this safety.
Why Sterility Is the Most Important Part of Any Piercing Kit
When it comes to piercing, sterility isn’t just a buzzword. It’s your first line of defense against serious infections. Equipment that contacts blood or enters tissue must be sterile—meaning free of bacteria, viruses, or fungi. Simply wiping with alcohol or boiling water doesn’t cut it. Professional studios use autoclaves—specialized machines that sterilize tools with high-pressure steam. Any kit claiming to be sterile must show clear indicators like lot numbers, expiration dates, and sterilization seals.
Imagine using a reusable needle that’s been cleaned with household disinfectants. It might look clean, but lurking bacteria or viruses could still be present. A sterile package, intact and unopened, confirms the item was processed under controlled conditions. If a kit’s packaging is damaged or missing sterilization info, it’s a red flag. When you’re piercing your body, you want to trust that every needle and tool is as clean as a surgeon’s instrument.
As an affiliate, we earn on qualifying purchases.
Why You Should Never Reuse Needles or Use Repackaged Equipment
Needles are designed for one-time use only. Professional piercers open a new, sterile needle for each piercing. Reusing or sharing needles can transfer bloodborne pathogens like hepatitis or HIV. Many DIY kits include unverified or unpackaged needles, or even worse, reusable ones that look clean but aren’t sterile anymore.
Picture trying to pierce your ear with an unwrapped needle that was used on someone else or even on you just minutes before. The risk of infection skyrockets. Always check for sealed, single-use packaging. If the kit contains unmarked, unpackaged, or visibly reused needles, it’s a danger sign. It’s better to buy sterile needles from a trusted supplier—your health is worth it.
Why Piercing Guns Are Not Suitable for Most Body Piercings
Piercing guns are quick and convenient, but they have serious limitations. They often cause more trauma—blunt force rather than a precise puncture—and are difficult, if not impossible, to sterilize thoroughly. Many professional piercers avoid them, especially for cartilage, nipples, or lip piercings, because they can cause uneven placement or damage tissue.
Imagine a gun firing a tiny, rigid needle into your nose or ear cartilage. It might seem fast, but it risks crushing delicate tissue or causing scarring. Plus, guns often use jewelry with external threading, which can snag or irritate a fresh wound. For safe, accurate placement—especially in sensitive areas—manual piercing with a sterile needle is the gold standard.
How Jewelry Material Choices Make or Break Your Healing
The jewelry you choose for a new piercing isn’t just about looks. It must be biocompatible—meaning it won’t cause allergic reactions or irritate your skin. Common professional options include implant-grade titanium, certain high-quality steels, solid gold (14K or higher), and niobium. These materials resist corrosion and minimize rejection or allergies.
Suppose you start with jewelry made of plated steel or acrylic. Once the plating chips or the material reacts with your skin, you could develop redness, swelling, or even tissue damage. Vague labels like “surgical steel” aren’t enough—look for specific standards like ASTM or ISO. Threadless, internally threaded jewelry is often preferred because it’s smoother and less likely to irritate.
Sizing and Placement: Getting It Right from the Start
Proper jewelry size isn’t about looks—it’s about safety and comfort. Starter kits often include one size fits all, but anatomy varies widely. Post length, gauge, and ring diameter must match your body’s shape and swelling levels. Jewelry that’s too short can embed into your skin; too long, and it can snag or irritate.
Imagine a nose piercing with a post that’s too short—causing pressure and pain or even embedding. Conversely, a ring that’s too large moves excessively, delaying healing or causing migration. A good piercer assesses your anatomy and recommends the right size. If your DIY kit includes only one size, remember it might not be suitable for your specific body part.
Why Technique and Placement Are Everything
Piercing isn’t just about pushing a needle through skin. It requires detailed knowledge of anatomy—blood vessels, nerves, cartilage—and careful technique. Proper angle, placement, and sterile procedures prevent complications. A professional uses gloves, sterile forceps, and precise methods to ensure safety.
For example, a lip piercing needs a specific angle to avoid hitting a tooth or nerve, while cartilage piercings demand different tools and approaches. DIY kits often lack this expertise, increasing the chance of misplacement, excessive bleeding, or tissue trauma. Remember, even owning forceps doesn’t make the technique safe—training and experience are essential.
Bloodborne-Pathogen Precautions You Can’t Skip
Piercing involves blood, which means the risk of transmitting infections if proper precautions aren’t followed. Professionals use hand hygiene, gloves, surface barriers, and approved disinfectants. They also handle sharps properly—immediately disposing of needles in puncture-resistant containers.
Imagine piercing yourself without gloves or proper waste disposal—contaminated needles could end up in household trash, posing danger to others. A DIY kit that lacks these safety supplies is a recipe for infection. Always ensure your setup includes gloves, a sharps container, and proper cleaning protocols—your health depends on it.
Keeping It Simple: Aftercare That Supports Healing
Proper aftercare is simple but vital. The main goal: keep the piercing clean, minimize irritation, and avoid contaminating the site. Use sterile saline—nothing more complicated or homemade—twice daily to rinse away debris. Wash your hands first, then gently pat dry with a clean disposable material.
Imagine a fresh nose piercing. You avoid touching it unnecessarily, no twisting or spinning, and keep cosmetics, alcohol, or peroxide away. Hands and jewelry should be clean, and you should resist the urge to pick at crusts or bump the piercing. Overcleaning or harsh products can delay healing. Follow your piercer’s instructions; they’re based on experience, not myths.
Healing Times and When to Change Jewelry — The Do’s and Don’ts
Healing times vary—sometimes surprisingly long. Earlobes can take 2-4 months; cartilage might need 6-12 months. Be patient. Jewelry changes before full healing can cause migration, rejection, or embedding. Wait for signs of healing—no redness, swelling, or tenderness—and get professional advice before switching jewelry.
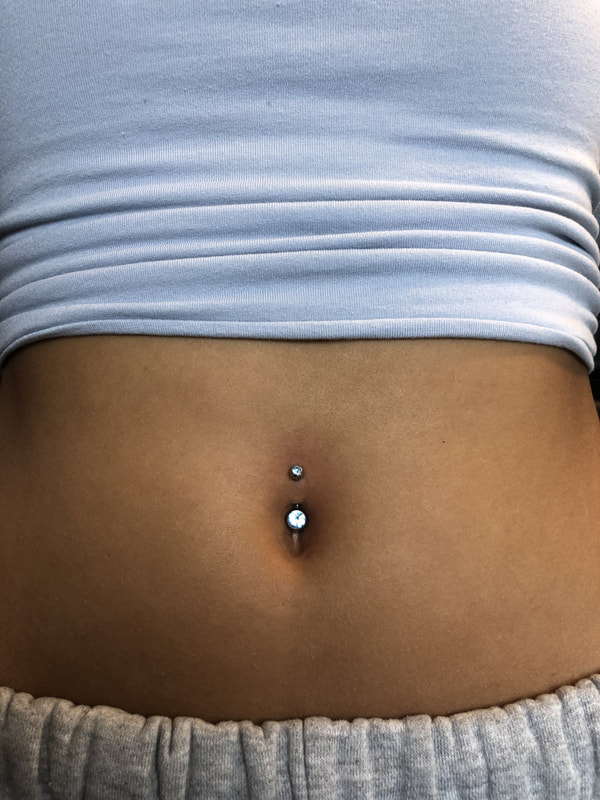
For example, a belly button piercing might still be swollen at 4 months. Changing jewelry too early risks complications. A professional can assess whether it’s safe, and downsizing to a shorter post reduces snagging once swelling resolves.
Recognizing Infection vs. Normal Healing Signs
It’s normal for a new piercing to be tender or have some crusting. But persistent redness, warmth, swelling, pus, or spreading redness signals trouble. Infection can be serious, but not all pain or swelling means infection. Sometimes, irritation from jewelry or pressure causes similar symptoms.
Picture a slight crust on your earlobe post-piercing—normal. But if redness worsens, becomes hot to touch, or you develop fever, seek medical help. Never remove jewelry prematurely; it can trap infection inside. Professional advice helps differentiate between normal healing and infection.
Warning Signs in a Starter Kit You Should Watch For
Be cautious if your kit includes or promotes reusable needles, piercing guns, jewelry with no material info, or unsterile packaging. Kits claiming “sterile” without proof, or those suggesting reusing instruments after household cleaning, are red flags. Such shortcuts increase risks of infection, rejection, or scarring.
Imagine buying a kit with plastic bags labeled “sterile” that are actually just packaging with no validation. Or jewelry that’s plated, acrylic, or externally threaded—these can irritate or delay healing. Always verify sterilization details, material standards, and avoid kits that skip crucial safety steps.
Industry Trends: What’s New and What to Watch For
The body piercing world is evolving fast. More presterilized, single-use needles are now available, reducing contamination risks. Titanium jewelry, especially implant-grade, is rising in popularity due to its safety and color options. Threadless systems offer easier jewelry changes, but proper sizing still matters.
Online DIY kits have surged, but they often lack safety assurances. Industry trends favor downsizing jewelry after swelling subsides, emphasizing evidence-based aftercare routines. Consumers now seek traceable materials and personalized placement advice—an encouraging shift toward safer, more informed piercing practices.
What a Proper Professional Piercing Setup Looks Like
A real professional setup involves much more than a kit. It includes certified training, bloodborne-pathogen education, a clean, licensed workspace, and sterilization protocols. Expect gloves, sterile instruments, implant-grade jewelry, sharps containers, and detailed recordkeeping.
Imagine a licensed studio where the piercer opens sterile packages in front of you, wears fresh gloves, and uses high-quality, traceable jewelry. They also check your anatomy, explain risks, and provide written aftercare instructions. Anything less—like a quick DIY kit or a home setup—lacks the safeguards needed for safety and peace of mind.
Frequently Asked Questions
Is it safe to pierce yourself with a starter kit?
Self-piercing with a DIY kit carries significant risks, including improper placement, infection, and tissue damage. A trained professional in a licensed studio is generally safer, as they follow strict hygiene, technique, and safety standards.
Can I sterilize a needle with alcohol or boiling water?
No. Neither alcohol nor boiling water reliably sterilizes equipment to medical standards. Always use professionally sterilized, single-use needles from a trusted supplier for safe piercing.
How do I know if my jewelry is safe for a new piercing?
Look for jewelry made of implant-grade titanium, 14K or higher gold, or high-quality surgical steel, with clear material specifications. Avoid plated, acrylic, or externally threaded pieces. Always verify the source and standards.
When can I change my jewelry after a piercing?
Jewelry should only be changed after full healing—often several months—under professional guidance. Premature changes can cause rejection, embedding, or migration. Wait until your piercer confirms it’s safe.
What’s the safest way to handle a piercing kit?
Use only sterilized, single-use needles, wear gloves, and handle all tools with care. Discard needles immediately in a sharps container, and follow proper hygiene and waste procedures. Never reuse or repackaged equipment without validation.
Conclusion
Choosing the right kit or professional can make all the difference between a beautiful, safe piercing and a painful, risky experience. Never underestimate the importance of proper equipment, technique, and aftercare. When in doubt, trust a trained piercer—your body deserves it.
Remember, a piercing is a permanent addition. Invest in safety first, and the results will speak for themselves—beautiful, healthy, and trouble-free. Your body is your canvas—treat it with care.
Halloween Picks
halloween
As an affiliate, we earn on qualifying purchases.