If your jewelry photos look flat, the missing piece is often how you handle lighting, angles, and backgrounds. Using soft, directional light and playing with reflections and highlights can add sparkle and depth. Choosing the right angles and textured backgrounds helps create a sense of dimension. Small adjustments can make your jewelry pop and look more realistic. Stick around, and you’ll find out exactly how to master these techniques and elevate your photos.
Key Takeaways
Incorporate textured backgrounds and contrasting colors to add visual depth and highlight jewelry’s details.
Use strategic lighting, including side and diffused light, to create shadows and reflections that enhance three-dimensionality.
Capture multiple angles and perspectives to showcase the jewelry’s shape and sparkle from different viewpoints.
Avoid plain, monotone backgrounds; opt for layered textures and reflective surfaces to add dimension.
Focus on highlighting surface details with proper lighting and avoid cluttered backgrounds to prevent flatness.
2-Pack Photography Lighting Kit, NiceVeedi 25W LED Video Light Kit, 2900-7000K Dimmable Studio Light with Tripod Stand, 73" Stream Light for Video Recording
Multiple Color Temperatures: 2900K, 4800K, 7000K options
Adjustable Brightness: 10% to 100% control via remote
Why Jewelry Photos Look Flat and How to Recognize It
Jewelry photos often look flat because they lack proper lighting and depth cues that bring jewelry to life. One common reason is the absence of texture contrast, which helps highlight a piece’s intricate details and surfaces. Without this contrast, everything appears uniform, making the jewelry seem two-dimensional. Additionally, background simplicity plays an essential role; a cluttered or overly complex background can distract from the jewelry and diminish its depth. When the background is clean and simple, it draws attention to the piece’s texture and shape, helping it pop visually. Recognizing flat-looking jewelry photos involves noticing dull surfaces, lack of shadow, and minimal differentiation between foreground and background. These signs indicate that adding texture contrast and simplifying the background can make your jewelry images more dynamic and engaging. Incorporating lighting techniques can further enhance the perception of depth and detail in your photos, especially when combined with understanding how visual cues influence depth perception. Paying attention to contrast can also significantly improve the overall appearance of your images, making the jewelry stand out more vividly. Moreover, understanding the importance of texture contrast can help you identify the subtle details that create a sense of dimension in your photos. Using the right lighting methods can highlight surface details and add the necessary shadows to create a three-dimensional effect.
How Lighting Creates Depth and Sparkle in Jewelry Photography
Lighting is the key to adding depth and sparkle to jewelry photos. Proper lighting creates contrast, making your pieces pop, while shadow play adds dimension. When you position your light source, aim for angles that emphasize the jewelry’s facets and materials. Using color contrast enhances visual interest, highlighting different metals or gemstones. Experiment with side lighting to cast subtle shadows that define shape, giving your jewelry a three-dimensional feel. Soft diffused light minimizes unwanted reflections, while sharper light creates dramatic sparkle. Balance is essential: too much direct light can flatten the image, while too little dulls the details. Incorporating lighting techniques that control shadows and highlights can elevate your photography to showcase jewelry’s true brilliance.
Using Reflections and Highlights to Add Realistic Dimension
Reflections can instantly add depth to your jewelry photos by creating a sense of space and dimension. Highlights on the surface of the jewelry help convey its shine and quality, making it stand out. By carefully controlling these elements, you’ll make your images look more realistic and eye-catching.
Enhancing Depth With Reflections
Adding reflections and highlights is a powerful way to create realistic depth in jewelry photos because they mimic how light interacts with shiny surfaces. To achieve this, focus on mirror effects that mirror the jewelry’s environment, adding authenticity and dimension. Consider the surface textures—smooth, matte, or textured—that influence how reflections appear. For polished pieces, sharp, bright reflections work best, emphasizing their curvature and form. For more textured surfaces, softer, diffused reflections help illustrate surface detail without overwhelming the shot. By strategically placing reflections and highlights, you guide the viewer’s eye and create a sense of depth, making the jewelry look more three-dimensional. Remember, subtlety is key; overly bright or harsh reflections can flatten the image instead of enhancing it. Incorporating lighting techniques can further improve how reflections interact with the jewelry, creating a more compelling image.
Creating Shine Through Highlights
To make jewelry photos pop, focus on creating strategic highlights that mimic how light naturally reflects off shiny surfaces. Pay attention to gemstone cuts, as their facets catch light differently, producing distinct reflections that add realism. For metal textures, emphasize bright highlights on smooth, polished areas while softening reflections on matte parts to create contrast. Use a small, focused light source to generate crisp highlights that follow the jewelry’s contours, emphasizing its shape. Adjust the angle and intensity to highlight the jewelry’s best features without overexposing. Properly placed highlights reveal depth and dimension, making flat images come alive. Remember, subtle variations in reflections and highlights are key to achieving a true-to-life, eye-catching jewelry photo.
Choosing Angles and Composition to Make Jewelry Shine
Choosing the right angles and composition can make a significant difference in how your jewelry appears in photos. To make your pieces shine, experiment with angles that highlight their best features—try shooting slightly above or from the side. Use color contrast to guarantee the jewelry stands out; a dark background can make metallics and gemstones pop. Additionally, pay attention to background texture; a smooth, uncluttered backdrop keeps the focus on the jewelry, while subtle textures can add depth without distraction. Avoid flat, head-on shots that don’t showcase the piece’s sparkle. Instead, use angles that reflect light and reveal intricate details. By thoughtfully composing your shots, your jewelry will appear more vibrant, eye-catching, and professional. Incorporating proper lighting techniques can further enhance the visual appeal and highlight the jewelry’s brilliance. Proper lighting not only accentuates the sparkle and shine but also helps avoid unwanted shadows that can make the piece look dull. Paying attention to visual balance ensures your photos are appealing and well-composed. Additionally, understanding how to utilize composition principles can help create more captivating images that draw viewers’ eyes directly to your jewelry.
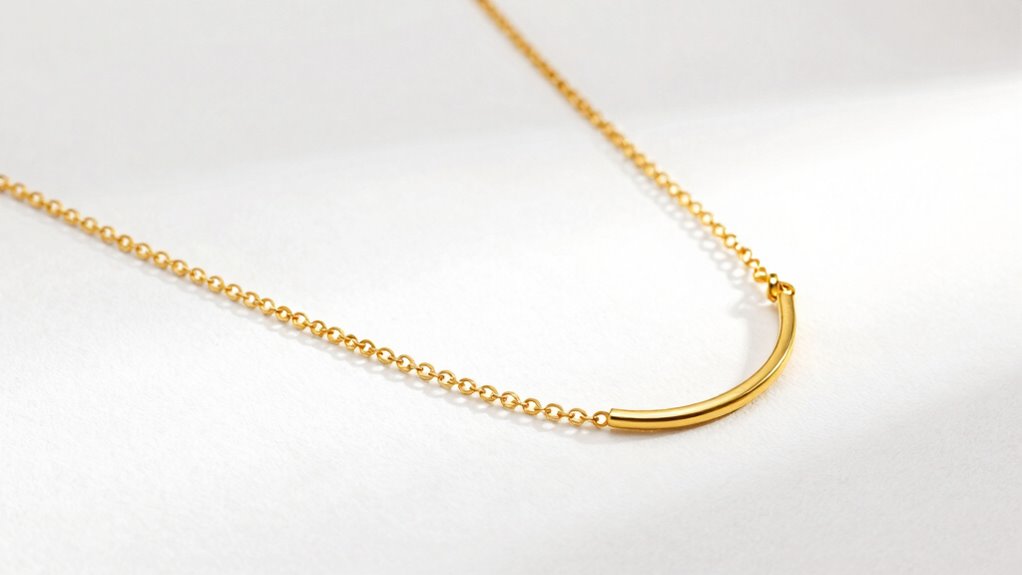
The Secret to Dazzling Jewelry Photos: Adding a 3D Element
Creating the illusion of depth is key to making jewelry photos truly stand out. To achieve this, you need to add a 3D element that catches the eye. Start by emphasizing color contrast; pairing jewelry with contrasting background colors makes the piece pop and adds visual depth. Incorporate background textures—think rough fabrics or matte surfaces—to create a layered look that guides the viewer’s eye through the photo. These textures break up flatness and give your jewelry a sense of dimension. Avoid plain, monotone backgrounds that can make your pieces look two-dimensional. Instead, use contrasting colors and textured backgrounds intentionally to enhance the jewelry’s form, sparkle, and detail. This simple trick transforms a flat shot into a mesmerizing, three-dimensional image.
Tips to Practice and Perfect Your Jewelry Photography Style
To improve your jewelry photography, focus on mastering lighting techniques that highlight the sparkle and details. Pay close attention to composition, ensuring each shot emphasizes the jewelry’s beauty, and don’t be afraid to experiment with different angles to find the most flattering view. Practicing these tips consistently will help you develop a distinctive and polished style. Additionally, consider incorporating car protection and accessories to create unique backgrounds and settings that make your jewelry stand out. Understanding contrast ratio can also help you adjust lighting to achieve deeper blacks and brighter whites, making your jewelry appear more vibrant and appealing. Moreover, being aware of safety tips for portable oil radiators can inspire you to create a comfortable and well-lit photography environment that minimizes hazards and distractions. Paying attention to lighting techniques is essential for capturing the true beauty of your jewelry. Incorporating elements like candy art or playful designs in your backgrounds can add an extra layer of visual interest and uniqueness to your photos.
Master Lighting Techniques
Proper lighting is the foundation of stunning jewelry photos, and mastering it can transform flat, dull images into mesmerizing displays. To achieve this, focus on how light enhances color contrast and highlights background textures. Here are four essential tips:
Use diffused light to soften shadows and bring out jewelry details.
Experiment with side lighting to add depth and dimension.
Incorporate reflective surfaces or bounce cards to brighten shadows without washing out the piece.
Adjust angles to emphasize color contrast, making gemstones or metals pop.
Pay attention to inclusive casting to ensure all jewelry styles are showcased with appropriate lighting techniques. Additionally, understanding vetted gear options can help you select the best tools for consistent, high-quality illumination. Incorporating proper lighting techniques is also essential for creating compelling images that highlight the unique features of each piece. Recognizing the importance of lighting techniques can significantly improve your photography results and help you stand out in a competitive market.
Focus on Composition
Because composition guides the viewer’s eye and highlights your jewelry’s best features, paying close attention to how you arrange your shot is essential. Use color contrast to make your jewelry pop—pairing a shiny silver necklace against a dark background or vibrant gemstone with a neutral backdrop creates visual interest. Keep background simplicity to avoid distractions; a clean, uncluttered backdrop ensures the focus remains on the jewelry. Position your piece thoughtfully, considering the rule of thirds or central framing to create balance. Avoid overcrowding your shot with props or busy backgrounds. Instead, let the jewelry stand out by emphasizing clarity and contrast. Practicing mindful composition helps your photos look professional and polished, drawing attention to the details that make your jewelry unique. Additionally, understanding how to capture the right lighting can significantly enhance the overall quality of your jewelry photos. Incorporating water-based techniques such as reflective surfaces or subtle water elements can also add an elegant touch to your compositions, making your jewelry appear more vibrant and appealing. Paying attention to luxury design elements can elevate the perceived value and aesthetic appeal of your jewelry images. Exploring popular electric dirt bike models and their features can also inspire creative ways to showcase your jewelry in more dynamic settings. In fact, researching precious metal investments can help you understand how to add a touch of sophistication and value to your presentation.
Experiment With Angles
Experimenting with different angles can dramatically enhance the appeal of your jewelry photos. By mastering angle variation and perspective shift, you reveal details that might otherwise go unnoticed. Try shooting from above to emphasize size and sparkle, or get close-up to highlight intricate designs. A slight tilt can add dynamic energy, while shooting straight on offers a clean, classic look. Here are four tips to refine your approach:
Rotate the jewelry to find the most flattering angle
Shift perspective to add depth and interest
Experiment with low and high angles for variety
Use multiple angles in one shoot to showcase versatility
These techniques help avoid flat images and bring your jewelry to life through strategic perspective shifts.
Frequently Asked Questions
What Camera Settings Are Best for Jewelry Photography?
You should set your camera to a low ISO for sharpness and accurate color correction. Use a macro lens or a lens with a close focusing distance to capture fine details. Adjust camera angles to highlight the jewelry’s best features and create depth. Keep the aperture around f/8 to f/11 for clarity, and guarantee proper lighting. These settings help your jewelry stand out with vibrant colors and appealing perspectives.
How Can Background Choices Influence Jewelry Depth Perception?
Your background choices greatly influence jewelry depth perception through color contrast and background texture. Use contrasting colors to make your jewelry stand out and create a sense of depth. Incorporate textured backgrounds, like fabric or subtle patterns, to add visual interest and prevent the photo from looking flat. These choices help your jewelry pop, giving your images a three-dimensional feel that attracts viewers and highlights the pieces’ details.
Are Macro Lenses Necessary for Capturing Jewelry Details?
You don’t always need a macro lens, but macro techniques can greatly enhance your jewelry photos. A macro lens is ideal for capturing tiny details with precision, making your jewelry stand out. Lens selection is essential—choose a lens with a good macro mode or one that allows close focusing. This guarantees you highlight intricate designs and textures, elevating your images from flat to engaging, without necessarily investing in specialized macro gear.
What Post-Processing Techniques Enhance Jewelry’s Three-Dimensional Appearance?
You can enhance your jewelry’s three-dimensional look with post-processing techniques like color correction and shadow enhancement. Color correction balances the tones, making the jewelry appear more vibrant and true-to-life. Shadow enhancement adds depth by emphasizing shadows and highlights, creating a sense of dimension. Use these techniques carefully to avoid overdoing it, and your jewelry photos will pop with realistic depth and appeal, drawing viewers in effortlessly.
How Do Jewelry Materials Impact Lighting and Reflection Strategies?
Think of jewelry materials as a mirror ball, reflecting light differently based on surface reflectivity and textures. You should tailor your lighting to each material; for instance, shiny metals need diffused light to avoid harsh reflections, while matte surfaces benefit from direct lighting to highlight texture. Recognizing how material textures and surface reflectivity influence light behavior helps you craft images that truly showcase jewelry’s depth and brilliance.
Conclusion
Now that you know the missing piece, you’re ready to transform flat jewelry photos into sparkling works of art. Think of lighting, reflections, and angles as your secret toolkit—each one a brushstroke adding depth and life. With practice, your images will dance with dimension, capturing every gleam and glow like a treasure chest bursting open. So go ahead, let your camera be the magic wand that turns flat into fabulous!
Thinking of an AI workstation? Discover whether building or buying a prebuilt offers better value, support, and performance in 2026. Make smarter choices today.
Glass Case or Rotating Display? The Retail Display Choice Explained
Providing key insights on choosing between glass cases and rotating displays, this guide helps you make the best retail display decision for your store.
How to Talk to Your Parents About Getting a Piercing
How to handle the conversation with your parents about getting a piercing can be tricky, but understanding their concerns is key to a successful discussion.