Connect with us

Specific Types of Piercings

Navel Piercings: Best Practices for Active Lifestyles

Follow these essential tips for caring for your navel piercing during an active lifestyle, and discover how to keep irritation at bay while exercising!

Published

on

active lifestyle navel piercing tips

If you've got a navel piercing and live an active lifestyle, you'll want to prioritize proper care. Wait at least two weeks before engaging in high-impact workouts to avoid irritation. During healing, stick to low-impact exercises and be mindful of your clothing; breathable garments help reduce sweat and friction. Clean your piercing with saline solution 2-3 times daily to prevent infection. Also, choose high-quality jewelry made from surgical steel or titanium to minimize discomfort. Staying vigilant about signs of complications can guarantee a successful healing process. There's a lot more to explore about care routines and specific exercise tips.

Key Takeaways

  • Wait at least two weeks before engaging in high-impact exercises to prevent strain on the navel piercing.
  • Clean the piercing with saline solution 2-3 times daily, especially after workouts, to prevent infection.
  • Choose jewelry made from surgical steel or titanium to minimize irritation and enhance comfort during physical activities.
  • Wear loose, breathable clothing to avoid friction and limit sweat exposure on the piercing area while exercising.
  • Monitor for signs of infection, such as persistent redness or swelling, and seek timely intervention if complications arise.

Understanding Navel Piercings

navel piercing insights explained

When you consider getting a navel piercing, it's important to understand what the process involves and how it can fit into your active lifestyle. Navel piercings typically involve creating a hole in the belly button area, with the most common placement on the upper rim.

Each piercing type, whether it's inverse, side, or double, requires specific aftercare to guarantee proper healing.

The healing process for a navel piercing usually takes between 6 to 12 months. During this time, you might notice initial signs like redness, swelling, and tenderness.

To minimize infection risks and promote healing, it's vital to choose high-quality piercing jewelry, often made from implant-grade titanium.

As you embrace your active lifestyle, remember to clean your piercing diligently. Use saline solutions and avoid tight clothing that can irritate the area.

Advertisement

This aftercare is essential to prevent complications and guarantee your navel piercing heals successfully. Understanding these aspects will help you enjoy your new piercing while maintaining an active, healthy routine.

Piercing Process Overview

body piercing procedure guide

Getting a navel piercing involves a careful and precise process that guarantees both safety and comfort. First, a professional piercer assesses your anatomy to determine the best placement for the piercing. They'll then thoroughly clean the area to reduce the risk of infection.

After marking the desired location, the piercer uses a sterilized 14g hollow needle to create the piercing, which minimizes complications compared to using a piercing gun.

Once the piercing is complete, it's important to choose high-quality jewelry, preferably made from implant-grade titanium. This type of jewelry is less likely to cause irritation during the initial healing phase.

You'll likely experience some post-piercing soreness and tenderness, which is completely normal.

Proper aftercare is vital for ensuring successful healing. Follow your piercer's aftercare instructions, which typically include keeping the area clean, avoiding swimming in pools or hot tubs, and not changing the jewelry until the piercing has fully healed.

Advertisement

Healing Timeline and Challenges

recovery journey and obstacles

Healing from a navel piercing is a journey that typically spans 6 to 12 months, with the first few weeks being particularly vital.

During this time, you might experience swelling and tenderness, which can be exacerbated by your workout regimen. To guarantee your piercing heals properly, avoid high-impact exercises or any activities that put pressure on the area for at least two weeks post-piercing.

Keeping your piercing clean is essential. Use a saline solution to cleanse the area regularly, as this helps prevent infection and minimizes long-term issues.

Monitor your piercing closely during the healing phase for any signs of complications—excessive redness, unusual swelling, or discharge can indicate problems that need attention.
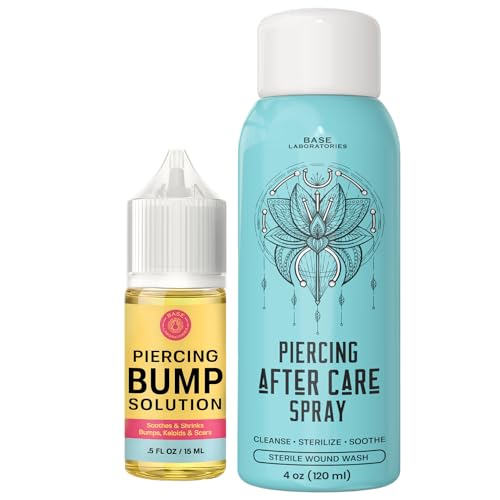
Importance of Aftercare

significance of post treatment support

Aftercare is essential for your navel piercing, and it starts with regular cleaning techniques.

You'll want to clean the area 2-3 times a day with saline solution to fend off infection.

Keeping an eye out for any signs of infection will help guarantee your piercing heals properly.

Advertisement

Regular Cleaning Techniques

For the first few months after getting your navel pierced, regular cleaning is essential to guarantee a smooth healing process. You should clean your new piercing with a saline solution 2-3 times daily. This helps prevent infection and promotes healing during the significant 6-12 weeks post-piercing.

Avoid using alcohol or peroxide, as these can dry out the area and hinder healing.

Incorporating saline soaks into your routine can be particularly beneficial. These soaks help keep the piercing moist and reduce irritation, which is important for an active lifestyle.

After your workout routine, make sure to clean the area thoroughly, as sweat can harbor bacteria that may lead to infection if left unaddressed.

While you perform your regular cleaning, keep an eye out for any signs of infection, such as unusual redness, swelling, or discharge. Monitoring these symptoms is essential for ensuring timely intervention if complications arise.

Advertisement

Infection Prevention Strategies

Proper aftercare is essential for keeping your navel piercing infection-free and ensuring it heals correctly. By following specific hygiene practices, you can promote healing and prevent complications.

Strategy Description Frequency
Saline Solution Cleaning Clean your navel piercing with saline solution. 2-3 times daily
Monitor for Infection Look for unusual redness, swelling, or discharge. Daily checks
Avoid Touching Don't touch your piercing with unwashed hands. Always

It's vital to keep the area dry. Stay away from pools, baths, or hot tubs until your piercing is fully healed. This helps prevent bacteria from entering the piercing site. Also, make sure to maintain a healthy diet and stay hydrated; this supports your body's healing and lowers the risk of infection. Remember, your navel piercing requires attention and care. By adhering to these practices, you can enjoy your active lifestyle without compromising your piercing's health!

Exercise Considerations for Healing

healing through targeted exercise

Navel piercings require careful attention during the healing process, especially when it comes to exercise. You need to be mindful of how your workouts might affect your healing piercing.

It's best to wait at least two weeks before engaging in vigorous exercise. High-impact activities, like weightlifting, can exert pressure on the navel area, which you should avoid during the initial healing phase.

Instead, consider these suggestions:

  • Opt for low-impact exercises, like walking or gentle stretching.
  • Modify your leg routines to prevent strain on the piercing.
  • Always listen to your body; if you feel discomfort or pain, take a break.
  • Clean your piercing regularly with a saline solution after workouts to prevent bacteria buildup.

Jewelry Choices for Active Lifestyles

active lifestyle jewelry options

When you're active, choosing the right jewelry for your navel piercing is essential for both comfort and safety.

Opt for materials like surgical steel or titanium to prevent irritation, and pick designs like flat back studs that won't snag easily during workouts.

Advertisement

Always consider how your jewelry fits and consult with a professional piercer to guarantee it meets your lifestyle needs.

Safe Jewelry Materials

Choosing the right jewelry material for your navel piercing is crucial, especially if you lead an active lifestyle. The materials you select can greatly affect your healing process and overall comfort.

Understanding the importance of common financial terms can help you make informed decisions about your budget for jewelry. Here are some safe jewelry materials to take into account:

  • Surgical Steel: This is the preferred choice, minimizing allergic reactions and offering durability for your active pursuits.
  • Implant-Grade Titanium: Lightweight and resistant to corrosion, it's perfect for those who engage in vigorous physical activities.
  • Avoid Organic Materials: These can break easily and may harbor bacteria, increasing the risk of infection.
  • Design Considerations: Opt for small, flat back studs or hoops that sit flush against the skin to reduce snagging during workouts.

Make sure the length of the jewelry barbell accommodates swelling during your initial healing phase. This helps prevent irritation and guarantees a smooth recovery.

Design for Comfort

Comfort is key for anyone with a navel piercing who leads an active lifestyle. You'll want jewelry that fits snugly and comfortably against your skin, minimizing the risk of snagging during workouts. Consider opting for flat back studs or small hoops, as they sit flush against the skin.

Choosing the right material is also important. Implant-grade titanium and surgical steel are excellent choices that reduce the risk of allergic reactions and irritation while you move. A good idea is to consult with a professional piercer to guarantee you select jewelry that accommodates swelling and movement.

Advertisement

Make certain to choose the right length for your jewelry; if it's too short, it can create pressure, while jewelry that's too long may snag or cause discomfort. Avoid organic materials since they can break easily and may harbor bacteria, increasing infection risks.

Here's a quick reference table for your jewelry options:

Jewelry Type Benefits
Flat Back Studs Sits flush, minimizes snagging
Small Hoops Comfortable and low-profile
Titanium/Surgical Steel Hypoallergenic, durable
Professional Piercer's Advice Guarantees comfort and safety

Protecting Your Piercing During Workouts

safeguarding piercings while exercising

Protecting your navel piercing during workouts is vital for ensuring its proper healing and preventing irritation. To keep your belly piercing safe while staying active, follow these best practices:

  • Wear breathable cotton garments that cover your jewelry, ensuring they aren't too tight.
  • Avoid high-impact exercises, like sit-ups and weightlifting, for at least two weeks post-piercing.
  • Keep your piercing away from gym machines and surfaces to minimize contact with bacteria.
  • Cover your piercing with a loose-fitting shirt to prevent snagging and limit sweat exposure.

After each workout, it's important to clean your piercing with a saline solution. This helps remove sweat and bacteria, promoting healthy healing.

Remember, new piercings are particularly sensitive; being careful during workouts will greatly reduce the risk of irritation or complications. Staying away from tight clothing and high-contact activities will also help you maintain your piercing's integrity.

Signs of Complications to Watch For

monitor complications carefully today

When you notice redness and swelling around your navel piercing, it's time to pay attention.

Persistent pain or discomfort, especially if it lasts more than a few weeks, could signal a problem.

Any unusual discharge or fluid should be addressed immediately to prevent further complications.

Advertisement

Redness and Swelling Indicators

While navel piercings can complement an active lifestyle, it's important to keep an eye out for signs of complications like redness and swelling. You should closely monitor these symptoms to guarantee proper healing and catch any potential infections early.

Here are some key indicators to watch for:

  • Persistent redness around the piercing that lasts more than a few days may signal inflammation or infection.
  • Increasing swelling during the initial healing phase is a cause for concern and should be closely observed.
  • Look for red or violet lines appearing above the piercing site, as these can indicate irritation or infection needing immediate attention.
  • If you notice bumps or pain developing four months after the piercing, it could mean an infection that requires prompt evaluation from a professional.

Continuous monitoring for unusual redness, discharge, or persistent swelling can help you catch complications early, improving your healing outcomes.

Staying vigilant will allow you to enjoy your navel piercing without compromising your active lifestyle. If in doubt, don't hesitate to consult a professional piercer for guidance.

Persistent Pain and Discomfort

After getting a navel piercing, you might experience some discomfort, but persistent pain that lingers beyond the initial healing period is a sign something could be wrong.

If you find that discomfort continues four months post-piercing, it could indicate an infection, and you should consult a professional piercer immediately.

Advertisement

Watch for red or violet lines appearing above the piercing; these can signal complications that need closer monitoring.

A noticeable bump around the piercing site, especially if it's painful, may suggest irritation or infection, requiring prompt attention.

If you notice skin tissue protruding from the piercing hole, it could mean excessive pressure on the jewelry, so adjustments might be necessary to prevent further issues.

Most navel piercings heal within 6 to 12 months, but consistent soreness beyond this timeframe warrants evaluation.

It's important to rule out serious problems like keloid formation or ongoing infection.

Advertisement

Taking these signs seriously will help guarantee your piercing remains a source of beauty rather than a source of discomfort.

Always prioritize your health and comfort in your active lifestyle.

Unusual Discharge or Fluid

Persistent pain and discomfort are indicators that something may be wrong with your navel piercing, but unusual discharge or fluid can be equally concerning. If you notice any discharge that's yellow, green, or foul-smelling, it could signal an infection and requires immediate evaluation by a professional.

While some clear or whitish fluid is normal during the healing process, keep an eye out for changes that may indicate complications.

Watch for these signs:

Advertisement
  • Persistent or increasing fluid, especially if it has an unusual color or odor
  • Red or violet lines above the piercing site, which may indicate irritation or infection
  • Bumps or pain after four months of healing, suggesting potential rejection or infection
  • Signs of excessive pressure around the piercing, along with fever or increased pain

If you experience any of these symptoms, it's essential to consult with a piercer or healthcare provider.

Early intervention can prevent further complications and help guarantee that your navel piercing remains a safe and enjoyable part of your active lifestyle.

Don't ignore these warning signs; your health should always be your priority.

Adjusting Your Workout Regimen

optimize your exercise routine

To guarantee a smooth shift back into your workout routine after getting a navel piercing, it's crucial to adjust your regimen during the healing process. Keep in mind that your body needs time to heal. Wait at least two weeks before engaging in vigorous workouts to reduce the risk of irritation.

During this initial phase, focus on low-impact activities like walking, stretching, or yoga. These exercises promote healing without putting pressure on your new piercing. The good news is that you can still stay active while being cautious.

Avoid high-impact exercises and movements that strain your abdominal area, like sit-ups or heavy weightlifting, until your piercing is fully healed, which can take 6 to 12 months.

As you adjust your workout, modify leg routines to prevent strain on the belly button piercing. Approach exercises like squats and lunges with caution initially.

Advertisement

Gradually increase the intensity of your workouts as healing progresses, always listening to your body. If you experience any discomfort, make the necessary adjustments.

With patience and care, you can maintain your active lifestyle while allowing your belly button piercing to heal properly.

Long-term Maintenance and Care

ongoing support and management

Maintaining the health of your navel piercing requires commitment even after the initial healing period. To keep your piercing looking great and free from complications, regular cleaning and monitoring are essential.

Here are some best practices to follow:

  • Use saline spray daily to cleanse the area and prevent infections.
  • Monitor for signs of irritation, like redness or swelling, to catch potential issues early.
  • Wear breathable clothing that reduces friction on the piercing site, promoting comfort during workouts.
  • Replace jewelry that's high-quality and hypoallergenic after the healing phase to minimize irritation.

Frequently Asked Questions

How to Exercise With a Navel Piercing?

To exercise with a navel piercing, wait two weeks before vigorous activity. Choose low-impact workouts, wear loose clothing, and clean your piercing after each session. Gradually increase intensity while listening to your body's signals.

How to Protect a Belly Piercing When Playing Sport?

Did you know that around 20% of belly piercings get infected post-exercise? To protect yours, wear loose clothing, avoid high-impact moves, and clean it regularly, ensuring you minimize irritation while staying active.

How Long After a Navel Piercing Can I Exercise?

You should wait at least two weeks after your navel piercing before exercising. This allows for initial healing. Listen to your body, and consult a professional for personalized advice based on your healing progress.

Advertisement

Do and Don'ts of a Belly Button Piercing?

When caring for your belly button piercing, clean it regularly, avoid tight clothing, and don't change the jewelry too soon. Stay away from high-impact exercises until it's fully healed to prevent complications.

Conclusion

In the vibrant dance of your active life, navel piercings can shine like a beacon of self-expression. By embracing aftercare and adjusting your workouts, you'll keep that sparkle intact while you conquer each challenge. Imagine the thrill of a high-energy class or a invigorating run, your piercing gleaming as a declaration of your commitment. Stay vigilant for any signs of trouble, and nurture your piercing like a cherished secret, ensuring it remains a stunning part of your journey.

Continue Reading
Advertisement

Specific Types of Piercings

Conch Piercings: Inner vs. Outer Conch Considerations

The choice between inner and outer conch piercings can impact healing time, pain level, and jewelry options—discover which one suits your style best.

Published

on

inner versus outer conch

When considering conch piercings, you'll find two main options: inner and outer. The inner conch sits closer to the ear canal and takes longer to heal, usually around 6 to 12 months. It may be slightly more painful, rated about 6 out of 10. In contrast, the outer conch heals faster, typically in 3 to 6 months, and offers more diverse jewelry styles. Both require good aftercare to minimize risks. Think about your pain tolerance, healing time preference, and jewelry choices before deciding. Explore further to pinpoint what's best for your unique style.

Key Takeaways

  • Inner conch piercings take longer to heal (6 to 12 months) compared to outer conch piercings (3 to 6 months).
  • Pain levels for both inner and outer conch piercings are similar, generally rated around 6 to 7 out of 10.
  • Inner conch piercings typically use labret studs for a discreet look, while outer conch piercings allow for larger hoops and decorative styles.
  • Proper aftercare is crucial to minimize complications and ensure successful healing for both types of conch piercings.
  • The choice between inner and outer conch piercings depends on personal preference for visibility, healing time, and jewelry style.

Overview of Conch Piercings

conch piercing details overview

Conch piercings, named after their resemblance to a conch shell, are a popular choice for those looking to enhance their ear jewelry. Located in the middle cartilage of your ear, these piercings can be categorized into two types: inner conch and outer conch. The inner conch is situated closer to your ear canal, while the outer conch rests on the flat area of your outer ear.

When considering a conch piercing, it's important to note the healing time. Generally, it can take anywhere from 3 to 9 months for your piercing to heal, depending on your skin type and aftercare. The inner conch usually requires more time to heal compared to the outer conch, which tends to be less sensitive and often adorned with larger hoops.

Pain levels for conch piercings range from 6 to 7 out of 10, primarily due to the thickness of the cartilage.

Both inner and outer conch piercings offer fantastic opportunities for customization, allowing you to mix and match jewelry styles for a unique, stacked look.

Inner Conch Piercing Details

inner conch piercing guide

Exploring the inner conch piercing reveals its unique placement within the ear's cartilage, right next to the ear canal. This piercing typically features a labret stud, which provides a subtle look while accommodating potential swelling during the healing process.

Expect the healing time for your inner conch piercing to range from 3 to 9 months. Individual experiences may vary, so following proper aftercare is essential for a smooth healing journey. While the inner conch piercing can be more painful than lobe piercings, rated at about 6/10, the aesthetic appeal often outweighs the discomfort.

Advertisement

Here's a quick overview of the inner conch piercing:

Aspect Details Notes
Placement Central area of ear's cartilage Adjacent to the ear canal
Healing Time 3 to 9 months Varies by skin type and care
Jewelry Options Labret stud or decorative pieces Allows for personal expression

Choosing the right piercing jewelry can enhance the beauty of your inner conch while also ensuring comfort during healing.

Outer Conch Piercing Insights

outer conch piercing guide

When considering an outer conch piercing, you'll find a wide range of jewelry options, from larger hoops to decorative studs that really stand out.

The healing time is generally quicker than inner conch piercings, usually taking about 3 to 9 months.

Keep in mind that pain levels can vary, but many rate it around a 6 out of 10, similar to inner piercings.

Jewelry Options Available

Outer conch piercings offer a variety of jewelry options that can elevate your style. With the right pieces, you can express your individuality while ensuring comfort. The typical gauge size for these piercings is 16G (1.2mm), which strikes a balance between aesthetic appeal and wearability.

Advertisement

When it comes to jewelry types, you have several choices, including larger hoops that provide dynamic styling. Here's a quick overview of popular options:

Jewelry Type Description Material Options
Seamless Hoops Simple, clean design without visible seams Implant-grade titanium, surgical steel
Segment Hoops Features removable segments for easy wear Implant-grade titanium, surgical steel
Clicker Hoops Easy to open and close for convenience Implant-grade titanium, surgical steel
Gemstone Adorned Decorated with gems for added flair Hypoallergenic materials
Unique Designs Custom shapes and styles for personal touch Various hypoallergenic metals

Choosing the right jewelry can enhance your outer conch piercings while reflecting your personal style. Make sure to wait until your piercing is fully healed before switching to more elaborate options!

Healing Time Expectations

Understanding healing time expectations for your conch piercing is essential for a smooth recovery. For an outer conch piercing, the healing time typically ranges from 3 to 6 months.

However, individual factors like skin type and aftercare can influence this timeline. Compared to inner conch piercings, which may take up to a year to heal, outer conch piercings tend to recover faster due to their placement on the outer cartilage.

To guarantee you navigate the healing process effectively, consider these key points:

Advertisement
  1. Follow Aftercare Instructions: Regularly clean the area and avoid irritants to minimize healing time and reduce the risk of complications.
  2. Monitor Symptoms: Some swelling and tenderness are normal. Keep an eye on these symptoms to gauge your healing progress.
  3. Leave Jewelry in Place: Don't change the jewelry too soon. The initial jewelry should stay in place for at least 3 to 6 months to guarantee complete healing.

Pain Level Assessment

Getting an outer conch piercing can bring a mix of excitement and apprehension, especially regarding the pain level. Generally, people rate the pain from this piercing around 6 to 7 out of 10, largely due to the thicker cartilage in that area. Many describe the sensation as a sharp pinch, with the pain subsiding quickly after the initial puncture.

However, remember that pain experiences can vary greatly based on individual pain tolerances and anxiety levels. What feels intense to one person might be barely noticeable to another.

While outer conch piercings tend to be more painful than lobe piercings, they're usually less painful than other cartilage piercings, like the tragus.

To help ease discomfort during the healing process, follow proper aftercare. Avoid touching or twisting the jewelry, as this can lead to unnecessary irritation.

Pain Levels and Sensations

pain assessment and experience

Pain during conch piercings can be a significant factor for those contemplating this body modification. On the pain scale, conch piercings typically rate between 6 to 7 out of 10. The intensity can vary based on your individual pain tolerance and the specific area being pierced.

Here are three key points to reflect on:

  1. Inner Conch vs. Outer Conch: If you're opting for an inner conch piercing, expect sharper and more intense pain due to the thicker cartilage compared to the outer conch, which may feel slightly less painful.
  2. Initial Sensation: Many people report a sharp pinch during the piercing, followed by a dull ache. However, some experience minimal discomfort, highlighting the variability in pain perception.
  3. Post-Piercing Care: Healing discomfort can arise after the procedure, especially if the jewelry is moved or disturbed. Proper aftercare is essential to minimize pain and promote healing.

Understanding these factors can help you prepare for the experience and make informed decisions regarding your conch piercing journey.

Healing Time Comparison

duration of recovery analysis

When it comes to healing times for conch piercings, you'll notice a distinct difference between the inner and outer variations. The inner conch typically has a longer healing time, ranging from 6 to 12 months. This extended period is often due to its proximity to the ear canal and the thicker cartilage involved. On the other hand, outer conch piercings generally heal faster, averaging 3 to 9 months. This quicker recovery makes them a popular choice for those who prefer less downtime.

Healing times can vary considerably based on individual factors like skin type, body chemistry, and aftercare practices. It's important to maintain diligent aftercare for both types of piercings to prevent complications that could lead to even longer healing times. Additionally, monitoring for signs of infection is vital, as untreated infections can prolong the healing process.

Advertisement

Here's a quick comparison of the healing times:

Type of Conch Average Healing Time Notes
Inner Conch 6 to 12 months Thicker cartilage
Outer Conch 3 to 9 months Generally faster recovery
Individual Variation Varies Depends on personal factors
Aftercare Importance Critical Prevents complications

Aftercare Essentials

post treatment care necessities

After getting a conch piercing, it's vital to stick to proper cleaning techniques to keep the area hygienic.

You'll want to avoid any movement of the jewelry and monitor for signs of infection closely.

Following these aftercare essentials will help guarantee a smooth healing process.

Cleaning Techniques

To guarantee your conch piercing heals properly, cleaning it twice daily with a saline solution or saline spray is vital. This simple cleaning technique helps prevent infection and promotes ideal healing.

Avoid using soap, alcohol, or hydrogen peroxide directly on the piercing, as these can irritate the tissue and delay your healing process.

Advertisement

Here are some key cleaning steps to follow:

  1. Use Clean Hands or Sterile Tools: Always wash your hands thoroughly or use sterile tools to minimize the risk of introducing bacteria during the cleaning process.
  2. Gently Wipe Around the Jewelry: When cleaning, carefully wipe around the jewelry without twisting or moving it. This prevents trauma to the piercing, which is important during the healing period.
  3. Monitor for Signs of Infection: Keep an eye on your piercing for increased redness, swelling, or discharge. If you notice any concerning symptoms, consult a professional immediately.

Jewelry Movement Restrictions

Jewelry movement restrictions are essential for ensuring your conch piercing heals properly. Unnecessary movement of the jewelry can lead to irritation, prolonging the healing stage and increasing the risk of complications.

To support your healing, it's important to keep the jewelry still and avoid any pressure from hats, tight headphones, or accessories. These items can cause trauma to the piercing, making it harder for your body to heal.

During this period, keep your hair tied back and away from the piercing to prevent tangling or accidental pulling of the jewelry. Regularly monitor the site for signs of infection, such as redness or swelling.

Infection Monitoring Tips

Keeping a close eye on your conch piercing is essential for preventing infections during the healing process. Regular inspections can help you catch any potential issues early. Here are some infection monitoring tips to keep in mind:

  1. Inspect Daily: Check your piercing for increased redness, swelling, or discharge, especially during the first few months. These signs could indicate an infection that needs attention.
  2. Clean the Area: Make sure to clean the piercing site at least twice daily using a saline solution or antiseptic spray. This practice minimizes the risk of infection and aids in healing.
  3. Avoid Irritants: Refrain from touching or twisting the jewelry, as this can introduce bacteria. Also, limit exposure to pools, hot tubs, and other bodies of water until the piercing is fully healed.

If you notice persistent symptoms like fever or worsening pain, consult a professional piercer or healthcare provider immediately.

Early detection and proper care are key to ensuring your healing process goes smoothly and safely.

Advertisement

Jewelry Options for Conch Piercings

conch piercing jewelry choices

When it comes to selecting the right jewelry for your conch piercings, you'll find a range of options that cater to both inner and outer piercings. For inner conch piercings, labret studs are the most common choice, while outer conch piercings often feature larger hoops or seamless rings for a bolder look.

Jewelry options typically range in gauge sizes from 14G to 16G, with your piercer determining the best size based on your individual anatomy. It's vital to choose the right gauge to guarantee a comfortable fit and promote healing.

When considering material options, go for implant-grade titanium, surgical steel, or hypoallergenic gold. These materials minimize the risk of allergic reactions during the healing process, which is significant for your comfort and safety.

After the initial healing period, usually around six months, you can explore various styles and designs, including decorative gemstones and unique shapes that reflect your personal style.

Just remember to consult with a professional piercer before making any jewelry changes to guarantee safe and proper modifications.

Cost Considerations

budgeting for expenses

Considering a conch piercing involves not just the procedure itself but also the costs associated with it. The average cost of a conch piercing ranges from $30 to $90, influenced by the piercer's expertise and location. When you factor in the price of quality jewelry, you might find the total expenses rising.

Here are some key cost considerations to keep in mind:

Advertisement
  1. Initial Piercing Costs: Expect to pay between $30 and $90 for the piercing itself, depending on your chosen artist and their experience.
  2. Jewelry Expenses: Quality jewelry can add another $50 to $100. Opting for implant-grade titanium or surgical steel is essential to avoid allergic reactions and guarantee a smooth healing process.
  3. Aftercare Products: Don't forget to budget for aftercare supplies, as maintaining hygiene is important during the healing process. These products can add to your overall costs.

Prioritizing the piercer's experience and the quality of jewelry over the lowest price can save you from complications and guarantee a successful healing experience.

Investing wisely here will pay off in the long run.

Potential Risks and Complications

health risks and complications

Steering through the world of conch piercings comes with certain potential risks and complications that every individual should be aware of. Neglecting proper aftercare can lead to infections and inflammation during the healing process, which can take anywhere from 3 to 9 months. Avoid using earbuds until your piercing is fully healed, as they increase the risk of irritation and infection.

It's also essential to recognize signs of complications early on. If you notice excessive redness, swelling, or discharge, consult a professional piercer or healthcare provider immediately.

Here's a quick overview of potential complications:

Complication Description
Infection Caused by improper aftercare or irritants.
Keloid Formation Excessive scar tissue growth, especially for sensitive skin.
Prolonged Healing Increased discomfort and pain, rated 6-7 out of 10.
Signs of Complications Redness, swelling, or discharge indicate issues.

Choosing the Right Piercing

selecting ideal body piercing

After understanding the potential risks and complications associated with conch piercings, it's time to focus on how to select the right one for you.

The choice between an inner conch and an outer conch piercing hinges on several key factors:

  1. Location: The inner conch is closer to the ear canal and typically requires a labret or cartilage stud, while the outer conch is on the flatter part of your ear, allowing for diverse jewelry options like hoops.
  2. Healing Time: If you prefer a quicker healing process, the outer conch may be your best bet, as it usually heals faster than the inner conch, which can take 6 to 9 months.
  3. Aesthetic Preference: Consider how visible you want your piercing to be. The inner conch offers a more subtle look, while the outer conch makes a bolder statement, showcasing your unique style.

Ultimately, choosing the right piercing involves balancing pain tolerance, healing time, and your personal style.

Think carefully about these factors to guarantee you make a decision that aligns with your preferences and lifestyle.

Advertisement

Frequently Asked Questions

What Is the Difference Between Inner and Outer Conch Piercings?

When you compare inner and outer conch piercings, you'll notice they differ in placement, healing times, jewelry styles, and aftercare needs. The inner conch is deeper, while the outer offers more design flexibility.

How Bad Does an Outer Conch Piercing Hurt?

About 30% of people rate outer conch piercings as a 7 on the pain scale. You'll feel a sharp pinch followed by pressure, and discomfort may linger for days, but proper care can help.

Can You Put a Hoop in an Inner Conch Piercing?

Yes, you can put a hoop in an inner conch piercing, but it's best to wait until it's fully healed. Initially, stick with a stud to minimize movement and irritation during the healing process.

How Do You Know if You Have the Anatomy for a Conch Piercing?

You might wonder if conch piercings fit your anatomy. Check your ear's cartilage size and shape. A professional piercer can assess its suitability during a consultation, ensuring enough space for your desired jewelry.

Conclusion

In the grand symphony of body art, conch piercings play a fascinating melody, whether you choose the inner or outer route. As you navigate your decision, remember that each option offers its own unique harmony of style and sensation. Embrace the journey, weigh the risks, and let your personal taste guide you. Ultimately, this choice is your chance to add a striking note to your aesthetic composition, creating a beautiful narrative that's distinctly yours.

Advertisement
Continue Reading

Specific Types of Piercings

Tragus Piercings: Pain Level, Healing Time, and Jewelry Options

Learn about tragus piercings, including pain levels, healing times, and jewelry options, and discover essential tips for a successful piercing experience.

Published

on

tragus piercing details overview

Tragus piercings have a pain level of about 4 to 5 out of 10, often feeling like a sharp pinch. Healing time can take anywhere from 3 to 12 months, with the initial tenderness easing within 1 to 2 weeks. For jewelry, consider surgical stainless steel or titanium, which are safe options, and choose flat back studs or hoops with appropriate gauge sizes, typically 16G. Proper aftercare is essential—clean your piercing regularly and avoid irritation. If you're curious about the best practices and jewelry types for your tragus piercing, there's more to uncover.

Key Takeaways

  • The pain level for a tragus piercing is rated between 4 to 5 out of 10, with a brief sharp pinch felt during the procedure.
  • Healing time varies from 3 to 12 months, with initial tenderness lasting 1 to 2 weeks.
  • Recommended jewelry materials include surgical stainless steel and titanium to reduce infection risk; avoid nickel if sensitive.
  • Standard gauge sizes for tragus piercings range from 14G to 18G, with 16G being the most common.
  • Proper aftercare involves cleaning with saline solution, avoiding irritation, and monitoring for signs of infection.

Overview of Tragus Piercings

tragus piercing details overview

If you're considering a unique addition to your body art, a tragus piercing might be the perfect choice. Located on the small cartilage flap in front of your ear canal, this piercing offers an alternative to traditional lobe piercings.

There are several types of tragus piercings to explore, including standard, double, surface, vertical, and anti-tragus, each providing distinct aesthetics and jewelry options.

When you decide to get a tragus piercing, it's vital to choose a professional piercer who prioritizes hygiene to minimize the risk of infection. The piercing process usually involves a brief sharp pinch, with the pain level typically rated between 4 to 5 out of 10.

After you get your piercing, healing time generally ranges from 3 to 12 months, depending on your individual care and health.

Aftercare is essential to guarantee proper healing and prevent complications. Recommended jewelry materials for new tragus piercings include surgical stainless steel and titanium, with standard gauge sizes typically at 16G.

Advertisement

Hoop diameters usually range from 6mm to 8mm, giving you plenty of options to express your style.

Pain Level and Sensation

pain intensity and experience

When you consider a tragus piercing, expect the pain level to sit around 4 to 5 out of 10.

You'll likely feel a sharp pinch for just a few seconds, accompanied by a bit of pressure due to the thick cartilage.

While the sound of the needle can be a bit startling, it doesn't really add to the pain you'll experience.

Pain Experience Overview

Getting a tragus piercing typically involves a pain level that's rated between 4 to 5 out of 10, making it one of the less painful ear piercings. Most people describe the discomfort as a brief sharp pinch rather than an intense pain. The initial discomfort lasts only a few seconds during the piercing process.

However, you might feel some pressure due to the thick cartilage in your tragus. While the sensation of the needle passing through can be a bit unnerving, your overall piercing experience will vary based on your individual pain tolerance and the skill of your piercer.

Advertisement

After the piercing, it's common to experience some swelling and tenderness, which can last for about a week. Thankfully, these symptoms are manageable with proper aftercare techniques, ensuring a smoother healing process.

Compared to other cartilage piercings, the tragus piercing is often considered more tolerable. Many individuals find the experience acceptable and not overwhelmingly painful, which can ease any concerns you might've about the discomfort involved.

With the right mindset and preparation, you can navigate your tragus piercing experience with confidence.

Sensation During Piercing

During a tragus piercing, you'll likely experience a brief, sharp sensation as the needle passes through the thick cartilage. This pain, often rated around 4 to 5 out of 10, can feel like a sharp pinch accompanied by a notable pressure. While the discomfort is intense for a few seconds, it usually subsides quickly.

The thickness of the cartilage in the tragus makes this piercing more intense compared to standard lobe piercings. However, your individual pain tolerance plays a significant role in how you perceive this sensation. An experienced piercer can help ease the process, minimizing discomfort by using efficient techniques and a calming approach.

Advertisement

Interestingly, some individuals find that the sound of the needle or the overall piercing process can be more unsettling than the actual pain itself.

Once the procedure is complete, the healing time for a tragus piercing varies, but it's essential to follow aftercare instructions to guarantee proper recovery.

When considering jewelry options, you'll want to choose materials that are both comfortable and suitable for your newly pierced tragus.

Healing Timeline

recovery progress schedule

The healing timeline for tragus piercings typically spans from 6 to 12 months, with your individual experience influenced by personal health and aftercare practices. Understanding this timeline helps set the right expectations for your tragus piercing.

Healing Phase Duration
Initial Healing 1 to 2 weeks
Early Healing 3 to 6 weeks
Mid Healing 7 to 12 weeks
Complete Healing Up to 12 months

In the initial phase, you might notice tenderness, swelling, and mild redness. By weeks 3 to 6, swelling usually decreases, but soreness may persist. From weeks 7 to 12, tenderness should reduce considerably, yet consistent aftercare remains crucial for ideal healing.

Complete healing can take longer due to the thickness of the cartilage, often requiring up to a year for full maturation. Regular check-ins with a professional piercer are wise throughout this process to monitor for any signs of infection or complications. Paying attention to your individual experiences and adhering to aftercare practices will be essential to guarantee a smooth healing timeline.

Advertisement

Aftercare Guidelines

post treatment care instructions

Aftercare is essential for ensuring your tragus piercing heals properly and stays free from infection. Follow these aftercare guidelines to promote healing.

Start by cleaning your piercing twice daily with a sterile saline solution. This will help keep the area free from bacteria. It's important to avoid touching or twisting the jewelry during the healing process, as this can irritate the piercing and lead to complications.

To reduce pressure on the piercing, make a conscious effort to avoid sleeping on the side of the piercing for at least 2 to 3 weeks. If you use headphones, opt for over-the-ear styles instead of earbuds to prevent friction and irritation.

Regularly monitor the piercing for signs of infection—such as increased redness, persistent pain, or unusual discharge—and consult a professional if you notice any concerning symptoms.

Jewelry Options and Materials

diverse jewelry materials available

When choosing jewelry for your tragus piercing, you'll want to contemplate styles that suit your taste and comfort.

Standard gauges typically range from 14G to 18G, with 16G being the most common.

It's also essential to select materials like surgical stainless steel or titanium to guarantee safety and minimize irritation during the healing process.

Advertisement

Jewelry Styles Overview

Choosing the right jewelry for your tragus piercing plays a vital role in both comfort and style. For new piercings, flat back studs are highly recommended to prevent irritation. They sit snugly against your skin and minimize movement, which is fundamental during the healing process.

As you progress past the initial healing period of 3 to 6 months, you can explore various jewelry styles. Hoops are popular, with hoop inner diameters typically ranging from 6mm to 8mm, guaranteeing comfort without compromising your piercing. You might also consider curved barbells or seamless hoops, which can add a unique flair to your look.

When selecting materials, opt for high-quality options like surgical stainless steel or titanium, especially if you have sensitive skin. These materials reduce the risk of healing complications and allergic reactions.

After you've healed, don't hesitate to express your personality with decorative options that showcase your style. Prioritizing both quality and comfort will guarantee your tragus piercing remains a beautiful and enjoyable accessory for years to come.

Recommended Sizes and Gauges

Understanding the right sizes and gauges for your tragus piercing can greatly enhance your experience and comfort. The standard gauge size is 16G, but you might also consider 18G or 14G based on your anatomy and preferences.

Advertisement

For hoop jewelry, aim for an inner diameter between 6mm and 8mm to guarantee a snug yet comfortable fit.

When it comes to initial piercings, shorter stud or barbell lengths of about 6mm are recommended. This helps minimize the risk of snagging and irritation while you heal. If you prefer curved barbells, opt for lengths between 6mm to 8mm to accommodate the tragus's shape comfortably.

Materials matter too. Surgical stainless steel, titanium, and 14k gold are popular choices. These materials are favored not just for their aesthetic appeal but also for their hypoallergenic properties, reducing the risk of irritation.

Choosing high-quality jewelry can make a significant difference in your overall experience. Remember, the right sizes and gauges will contribute to a smoother healing process and a more enjoyable tragus piercing journey.

Material Safety Considerations

Material safety is essential for a successful tragus piercing experience. Choosing the right jewelry options can greatly impact your healing process and overall comfort.

Advertisement

If you have nickel sensitivity, you should avoid materials containing nickel. Instead, opt for nickel-free options like titanium or 14k gold, as they minimize the risk of irritation and allergic reactions. Incorporating fiber-rich additions to your diet can also contribute to overall health during the healing process.

Common materials for tragus jewelry include surgical stainless steel, titanium, and 14k gold. Titanium is particularly popular due to its biocompatibility and low risk of allergic reactions. When selecting your jewelry, you'll typically choose a gauge size of 16G, which balances comfort and durability for initial piercings.

For new tragus piercings, flat back studs are recommended. They help reduce irritation caused by friction, while hoops and barbells can be introduced once your piercing is fully healed.

Always prioritize quality by selecting implant-grade materials, as lower-quality metals can lead to infections or delayed healing. By paying attention to material safety, you can promote a smoother healing process and enjoy your tragus piercing without complications.

Cost Factors

expense considerations and impacts

When evaluating a tragus piercing, it's important to factor in several costs that can influence your budget. The price of a tragus piercing typically costs between $30 to $80, depending on the studio's location and the piercer's experience.

Additionally, you'll want to take into account the following cost factors:

Advertisement
  • Jewelry Options: The cost of jewelry can range from $19.90 to $22.90, with higher-quality options like implant-grade titanium and 14k gold being more expensive.
  • Aftercare Products: Some studios may include aftercare products in the piercing price, while others charge separately.
  • Follow-Up Visits: Hidden costs may arise from follow-up visits for jewelry changes or consultations regarding healing.
  • Total Expenses: Always inquire about total expenses upfront to avoid surprises later.

Keep in mind that while the initial cost of a tragus piercing is significant, additional expenses related to jewelry and aftercare can add up.

Health Considerations

wellness and safety priorities

Getting a tragus piercing involves more than just the aesthetic appeal; health considerations are vital for a successful experience. The cartilage in your tragus has a lower blood supply, which increases the risk of infection. Proper aftercare is essential during the healing period to guarantee that your piercing heals well.

Here's a quick overview of key health considerations:

Consideration Description Recommendations
Infection Higher risk due to low blood supply Follow aftercare guidelines strictly
Allergic Reactions Reactions to materials like nickel Choose high-quality jewelry options
Keloids Scarring may occur for those prone to it Monitor for symptoms; consult a professional
Healing Time May be longer for individuals with health issues Consult a healthcare professional if needed

Be mindful that poor aftercare practices, like touching or twisting the jewelry, can lead to irritation and prolonged healing. If you have a compromised immune system or pre-existing health conditions, seek advice from a healthcare professional before proceeding with your tragus piercing. Prioritizing these health considerations can help you enjoy your piercing with minimal complications.

Frequently Asked Questions

How Long After a Tragus Piercing Can You Change the Jewelry?

You should wait at least 3 to 6 months before changing your tragus piercing jewelry. Make sure it shows no signs of redness or swelling, indicating it's fully healed, to avoid irritation or infection.

How Long Does Tragus Piercing Hurt and Heal?

You'll feel sharp discomfort for a few minutes during the piercing, and it might ache for a week. Healing can take anywhere from 2 to 12 months, so be patient and follow aftercare instructions.

What Is the Pain Scale for a Tragus Piercing?

You might wonder how much it hurts. On a scale of 1 to 10, a tragus piercing usually sits around 4 to 5. Expect a sharp pinch, but it's over quickly—most find it manageable.

Advertisement

Should I Get a Hoop or Stud for My Tragus Piercing?

You should start with a stud for your tragus piercing. It minimizes irritation and promotes healing. Once healed, you can switch to a hoop for a different look and added versatility. Enjoy the process!

Conclusion

In the end, getting a tragus piercing can feel like starting on a small adventure, a journey into self-expression that can be both thrilling and a bit intimidating. Just like a treasure map, the path to healing and choosing the right jewelry will lead you to a unique treasure that reflects your style. Embrace the experience, follow the aftercare guidelines, and soon you'll wear your tragus piercing like a badge of honor, shining with personality and flair.

Continue Reading

Specific Types of Piercings

Eyebrow Piercings: Placement Options and Facial Compatibility

Just explore the intriguing world of eyebrow piercings, where placement options can dramatically enhance your facial features and personal style. Discover your perfect fit!

Published

on

eyebrow piercings placement and compatibility

Eyebrow piercings come in various placements, enhancing your unique facial features. You can choose vertical or horizontal piercings, or even go for a bridge or anti-eyebrow placement. Each option complements different face shapes and aesthetics. When selecting placement, consider your anatomy and the impact on your overall look. Healing times vary but typically last six to eight weeks, with proper care essential to avoid complications. High-quality jewelry materials like gold or titanium are recommended for comfort and style. There's a lot more to discover about these piercings and how they can fit your individual flair.

Key Takeaways

  • Vertical eyebrow piercings elongate the face, while horizontal piercings enhance the brow line for a modern aesthetic.
  • Anti-eyebrow piercings highlight the cheekbone, providing a unique flair, but require caution due to nearby capillaries.
  • Anatomical assessment is crucial for determining suitable piercing placements and ensuring facial feature complementarity.
  • Centered eyebrow piercings have a higher risk of irritation bumps due to eyelid pressure and should be approached with care.
  • Quality jewelry, such as titanium or gold, is essential to prevent complications and enhance overall aesthetic appeal.

Types of Eyebrow Piercings

eyebrow piercing variations explained

Eyebrow piercings come in several exciting styles, each offering a unique look. The standard vertical eyebrow piercing is one of the most popular choices, typically placed toward the outer third of the brow.

If you're looking for something different, consider horizontal eyebrow piercings, which are often surface piercings located above, below, or even within the brow.

Bridge piercings, also known as mid-brow piercings, require careful anatomical consideration to avoid rejection, as they should be placed perpendicular to the tissue for the best results.

If you want a bolder option, anti-eyebrow piercings sit below the eye on the cheekbone, providing a striking aesthetic, but you'll need to be cautious to avoid nearby capillaries.

Each type of eyebrow piercing has specific jewelry options tailored to its placement. For instance, curved barbells are often recommended for vertical eyebrow piercings, while surface bars work well for horizontal piercings to minimize rejection risks.

Advertisement

Whatever style you choose, understanding these variations can help you achieve the perfect look that complements your facial features.

Placement Considerations

job placement factors evaluated

When deciding on your eyebrow piercing placement, you'll want to assess your unique anatomy to guarantee it's suitable.

The aesthetic impact of your choice can greatly affect your overall look, so consider how it complements your features.

Additionally, keep in mind the healing considerations and potential risks associated with different placements to guarantee a smooth recovery.

Anatomical Suitability Assessment

For ideal eyebrow piercing placement, evaluating your anatomical features is fundamental. The presence of sufficient tissue and protrusion is essential for supporting the jewelry and guaranteeing a successful healing process.

Standard placements typically lie toward the outer edge of the brow, angled slightly toward the eye, and perpendicular to the eyebrow for both aesthetic appeal and comfort.

Advertisement

If you're assigned female at birth, you might face challenges due to anatomical differences, but many still have suitable structures for piercing. Centered eyebrow piercings require careful anatomical assessment because they demand more protrusion and can lead to irritation bumps from eyelid pressure.

As a result, consulting a professional piercer is critical to confirm your piercing placement aligns with your ideal anatomy.

Also, remember eyebrow asymmetry is common, so use your pupils as a guideline for a balanced look. By understanding your facial compatibility with various placements, you can set realistic expectations and make informed decisions about your eyebrow piercing.

Ultimately, a thorough evaluation will help you achieve a piercing that not only looks great but also heals well.

Placement Aesthetic Impact

The placement of your eyebrow piercing plays an essential role in enhancing your overall facial aesthetics. Choosing the right spot can truly complement your facial anatomy and influence how others perceive you. Here are some key considerations to keep in mind:

Advertisement
  • Standard vertical eyebrow piercings are typically positioned toward the outer third for ideal aesthetic appeal.
  • Horizontal eyebrow piercings can be tricky; they should be tested in front of a mirror to find the best angle.
  • Mid-brow piercings must be placed perpendicularly to the tissue to avoid issues like rejection or migration.
  • Anti-eyebrow piercings offer flexibility but require careful placement to prevent damaging nearby capillaries.
  • Remember, the placement can affect your facial expressions, potentially leading to misinterpretations of your emotions.

Ultimately, each type of piercing placement has its unique aesthetic impact.

By considering your facial shape and the relationship between the piercing and your natural features, you can achieve a look that resonates with your personal style while enhancing your overall appearance.

Make sure to think carefully about where you want that piercing to go!

Healing Considerations and Risks

Healing after an eyebrow piercing requires careful attention to placement and aftercare. Centered eyebrow piercings can be more prone to irritation bumps due to pressure from the eyelid and the jewelry, making an anatomical assessment essential for successful placement. Additionally, risks of migration and rejection are higher with centered piercings, so take these factors into account.

Consideration Details
Irritation Pressure from eyelids and jewelry can cause bumps.
Migration Centered placements have a higher risk of movement.
Rejection Traditional placements face lower rejection rates.
Aftercare Diligent care is critical to minimize moisture-related issues.
Jewelry Quality Always choose high-quality jewelry to prevent complications.

Regular check-ins with a professional piercer during the healing process can help you address any signs of irritation or complications related to your specific placement. By being proactive about aftercare and monitoring any changes, you can guarantee a smoother healing journey and reduce risks associated with your new eyebrow piercing.

Healing Process Overview

comprehensive healing process summary

When you get an eyebrow piercing, understanding the healing process is vital for a successful outcome. The healing duration typically ranges from 6 to 8 weeks, but some may experience a healing time of up to a year based on individual factors.

During the initial healing phase, you might notice some bruising that looks like a subtle black eye; don't worry, this is normal and should fade within a few days.

Advertisement

To guarantee proper healing, keep these tips in mind:

  • Regular cleaning with saline solution is essential.
  • Avoid contact with hair products and makeup to prevent irritation.
  • Monitor for signs of infection, such as redness or swelling.
  • Be aware of potential piercing rejection.
  • Schedule regular follow-ups with your professional piercer.

If you're a side sleeper or lead an active lifestyle, take extra care to minimize irritation, as this can prolong your healing time.

Following these guidelines will help you navigate the healing process more smoothly and guarantee your piercing looks great!

Jewelry Options

diverse accessory selections available

After your eyebrow piercing has healed, choosing the right jewelry becomes a key aspect of enhancing your look and guaranteeing ongoing comfort.

For vertical eyebrow piercings, a curved barbell is your best bet, as it promotes healing and comfort. If you've opted for a horizontal or anti-eyebrow piercing, surface bars are recommended to minimize rejection risks.

For bridge piercings, straight barbells made from titanium offer both style and tissue support, while curved barbells might compromise that essential support.

It's best to steer clear of hoops for fresh piercings, as they can snag and lead to migration, complicating the healing process.

Advertisement

Quality matters; gold or platinum jewelry is durable and less likely to irritate your skin. Avoid gold-plated options, since they can cause irritation over time.

Once your piercing is fully healed, you can explore decorative jewelry pieces, like small gemstones, to personalize your look. Just guarantee these additions don't interfere with the integrity of the piercing or its healing.

Choosing the right jewelry not only enhances your appearance but also supports the longevity of your piercings.

Risks and Complications

health risks and complications

Steering through the world of eyebrow piercings involves understanding the risks and complications that can arise. Here are some key points to reflect on:

  • Higher risk of migration and rejection due to surface piercing nature
  • Individual anatomy impacts healing and complications
  • Jewelry choice affects irritation bumps and discomfort
  • Lifestyle can increase complication likelihood
  • Healing times can vary greatly

Eyebrow piercings, as surface piercings, face a greater chance of migration and rejection when compared to other facial piercings.

Factors such as your individual anatomy, jewelry choice, and lifestyle can greatly impact the healing process. If you're an active person or tend to sleep on your side, you might experience complications more frequently.

Common issues include irritation bumps caused by snagging, improper jewelry, or pressure from the eyelid.

Advertisement

Healing typically takes 6 to 8 weeks, but some placements might require longer. During this time, proper aftercare is essential to monitor for signs of irritation or infection.

If rejection occurs, promptly removing the jewelry can prevent more serious complications. Regular check-ins with your piercer can help address any concerns early on.

Aesthetic Impact and Trends

visual style and evolution

Eyebrow piercings often enhance personal style and can dramatically alter your facial expression and symmetry. The aesthetic impact of these piercings depends greatly on their placement options and how they interact with your natural anatomy. As trends in piercing evolve, more unique and nontraditional styles are becoming popular, allowing for greater personal expression.

Here's a quick overview of some trends in eyebrow piercings:

Placement Style Aesthetic Impact Jewelry Choices
Vertical Piercings Adds verticality, elongates the face Barbells, rings
Horizontal Piercings Enhances brow line, modern look Straight barbells, studs
Anti-Eyebrow Piercings Unique flair, draws attention to the cheekbone Captives, curved barbells
Multiple Piercings Creates a statement, showcases individuality Mix of materials, colors

Horizontal eyebrow piercings are particularly trendy, frequently seen on celebrities, as they flatter the face and complement facial symmetry. The choice of jewelry, such as durable gold or titanium, further enhances the overall aesthetic. So, when considering an eyebrow piercing, think carefully about these elements to make a statement that reflects your unique style.

Frequently Asked Questions

Where Is the Correct Placement for Eyebrow Piercing?

When considering placement for your eyebrow piercing, aim for the outer third or quarter of your brow. Confirm it's perpendicular for aesthetics, and keep in mind your unique facial features to achieve the best look.

Advertisement

What Side Should I Get My Eyebrow Pierced on When I'm a Woman?

Did you know about 70% of women choose to pierce their eyebrows on their non-dominant side? Consider your comfort, personal style, and cultural influences when deciding which side to enhance your unique look.

How Do You Know if an Eyebrow Piercing Suits You?

To know if an eyebrow piercing suits you, assess your facial features and shape. Experiment with placements in front of a mirror, and consider consulting a professional piercer for tailored advice that complements your unique look.

What Are the Choices for Eyebrow Piercings?

You might think there's only one way to pierce an eyebrow, but surprise! You've got choices: vertical, horizontal, anti-eyebrow, and bridge piercings. Each offers a unique flair, just waiting for your personal touch.

Conclusion

In the end, choosing an eyebrow piercing is like picking out the perfect pair of vintage jeans—it's all about what suits you best. Consider your facial features and personal style, and don't rush the healing process. With the right jewelry and care, your piercing can be a stunning addition to your look. Just remember, while it's a bold statement today, it'll be a timeless expression of your individuality for years to come.

Advertisement
Continue Reading
Advertisement

Affiliate Disclaimer
As an affiliate, we may earn a commission from qualifying purchases. We get commissions for purchases made through links on this website from Amazon and other third parties.

Latest

inner versus outer conch inner versus outer conch
Specific Types of Piercings31 mins ago

Conch Piercings: Inner vs. Outer Conch Considerations

The choice between inner and outer conch piercings can impact healing time, pain level, and jewelry options—discover which one suits...

active lifestyle navel piercing tips active lifestyle navel piercing tips
Specific Types of Piercings1 day ago

Navel Piercings: Best Practices for Active Lifestyles

Follow these essential tips for caring for your navel piercing during an active lifestyle, and discover how to keep irritation...

tragus piercing details overview tragus piercing details overview
Specific Types of Piercings2 days ago

Tragus Piercings: Pain Level, Healing Time, and Jewelry Options

Learn about tragus piercings, including pain levels, healing times, and jewelry options, and discover essential tips for a successful piercing...

eyebrow piercings placement and compatibility eyebrow piercings placement and compatibility
Specific Types of Piercings3 days ago

Eyebrow Piercings: Placement Options and Facial Compatibility

Just explore the intriguing world of eyebrow piercings, where placement options can dramatically enhance your facial features and personal style....

diverse lip piercing styles diverse lip piercing styles
Specific Types of Piercings4 days ago

Lip Piercings: From Labrets to Medusa and Beyond

Mastering the art of lip piercings unveils a world of styles and meanings; discover which piercing resonates with your unique...

helix piercing options available helix piercing options available
Specific Types of Piercings5 days ago

Helix Piercings: Single, Double, and Triple Options

Learn about helix piercings—single, double, and triple styles—and discover the perfect jewelry options that will elevate your look to new...

nostril vs septum piercings nostril vs septum piercings
Specific Types of Piercings6 days ago

Nostril Piercings vs. Septum Piercings: Which Is Right for You?

You might be torn between nostril and septum piercings; discover which style suits your personality and lifestyle best.

snakebite piercings care guide snakebite piercings care guide
Specific Types of Piercings1 week ago

Snakebites Piercings: Styles, Healing, and Aftercare

Keen to explore the striking world of snakebite piercings? Discover their styles, healing process, and essential aftercare tips that leave...

distinctive ear piercing styles distinctive ear piercing styles
Specific Types of Piercings1 week ago

Orbital Piercings: Unique Ear Designs and Considerations

How can orbital piercings transform your ear aesthetics and what should you know about placement, pain, and aftercare? Discover the...

ancient piercings cultural significance ancient piercings cultural significance
Cultural and Historical1 week ago

Piercings in Ancient Roman and Greek Cultures: Practices and Symbolism

Ancient Roman and Greek piercings revealed profound meanings of status and identity, but what hidden messages did these adornments truly...

body piercing s fashion impact body piercing s fashion impact
Cultural and Historical1 week ago

The Influence of Body Piercing on Modern Fashion Design

Not only do body piercings redefine contemporary fashion, but they also challenge traditional norms, inviting a deeper exploration of this...

victorian era body piercing perceptions victorian era body piercing perceptions
Cultural and Historical2 weeks ago

How Body Piercings Were Viewed in Victorian-Era Society

Amidst strict societal norms, body piercings in Victorian society revealed hidden desires, challenging perceptions of morality and identity. What secrets...

Trending

Copyright © 2024 Piercings-Body Affiliate disclaimer As an affiliate, we may earn a commission from qualifying purchases. We get commissions for purchases made through links on this website from Amazon and other third parties.